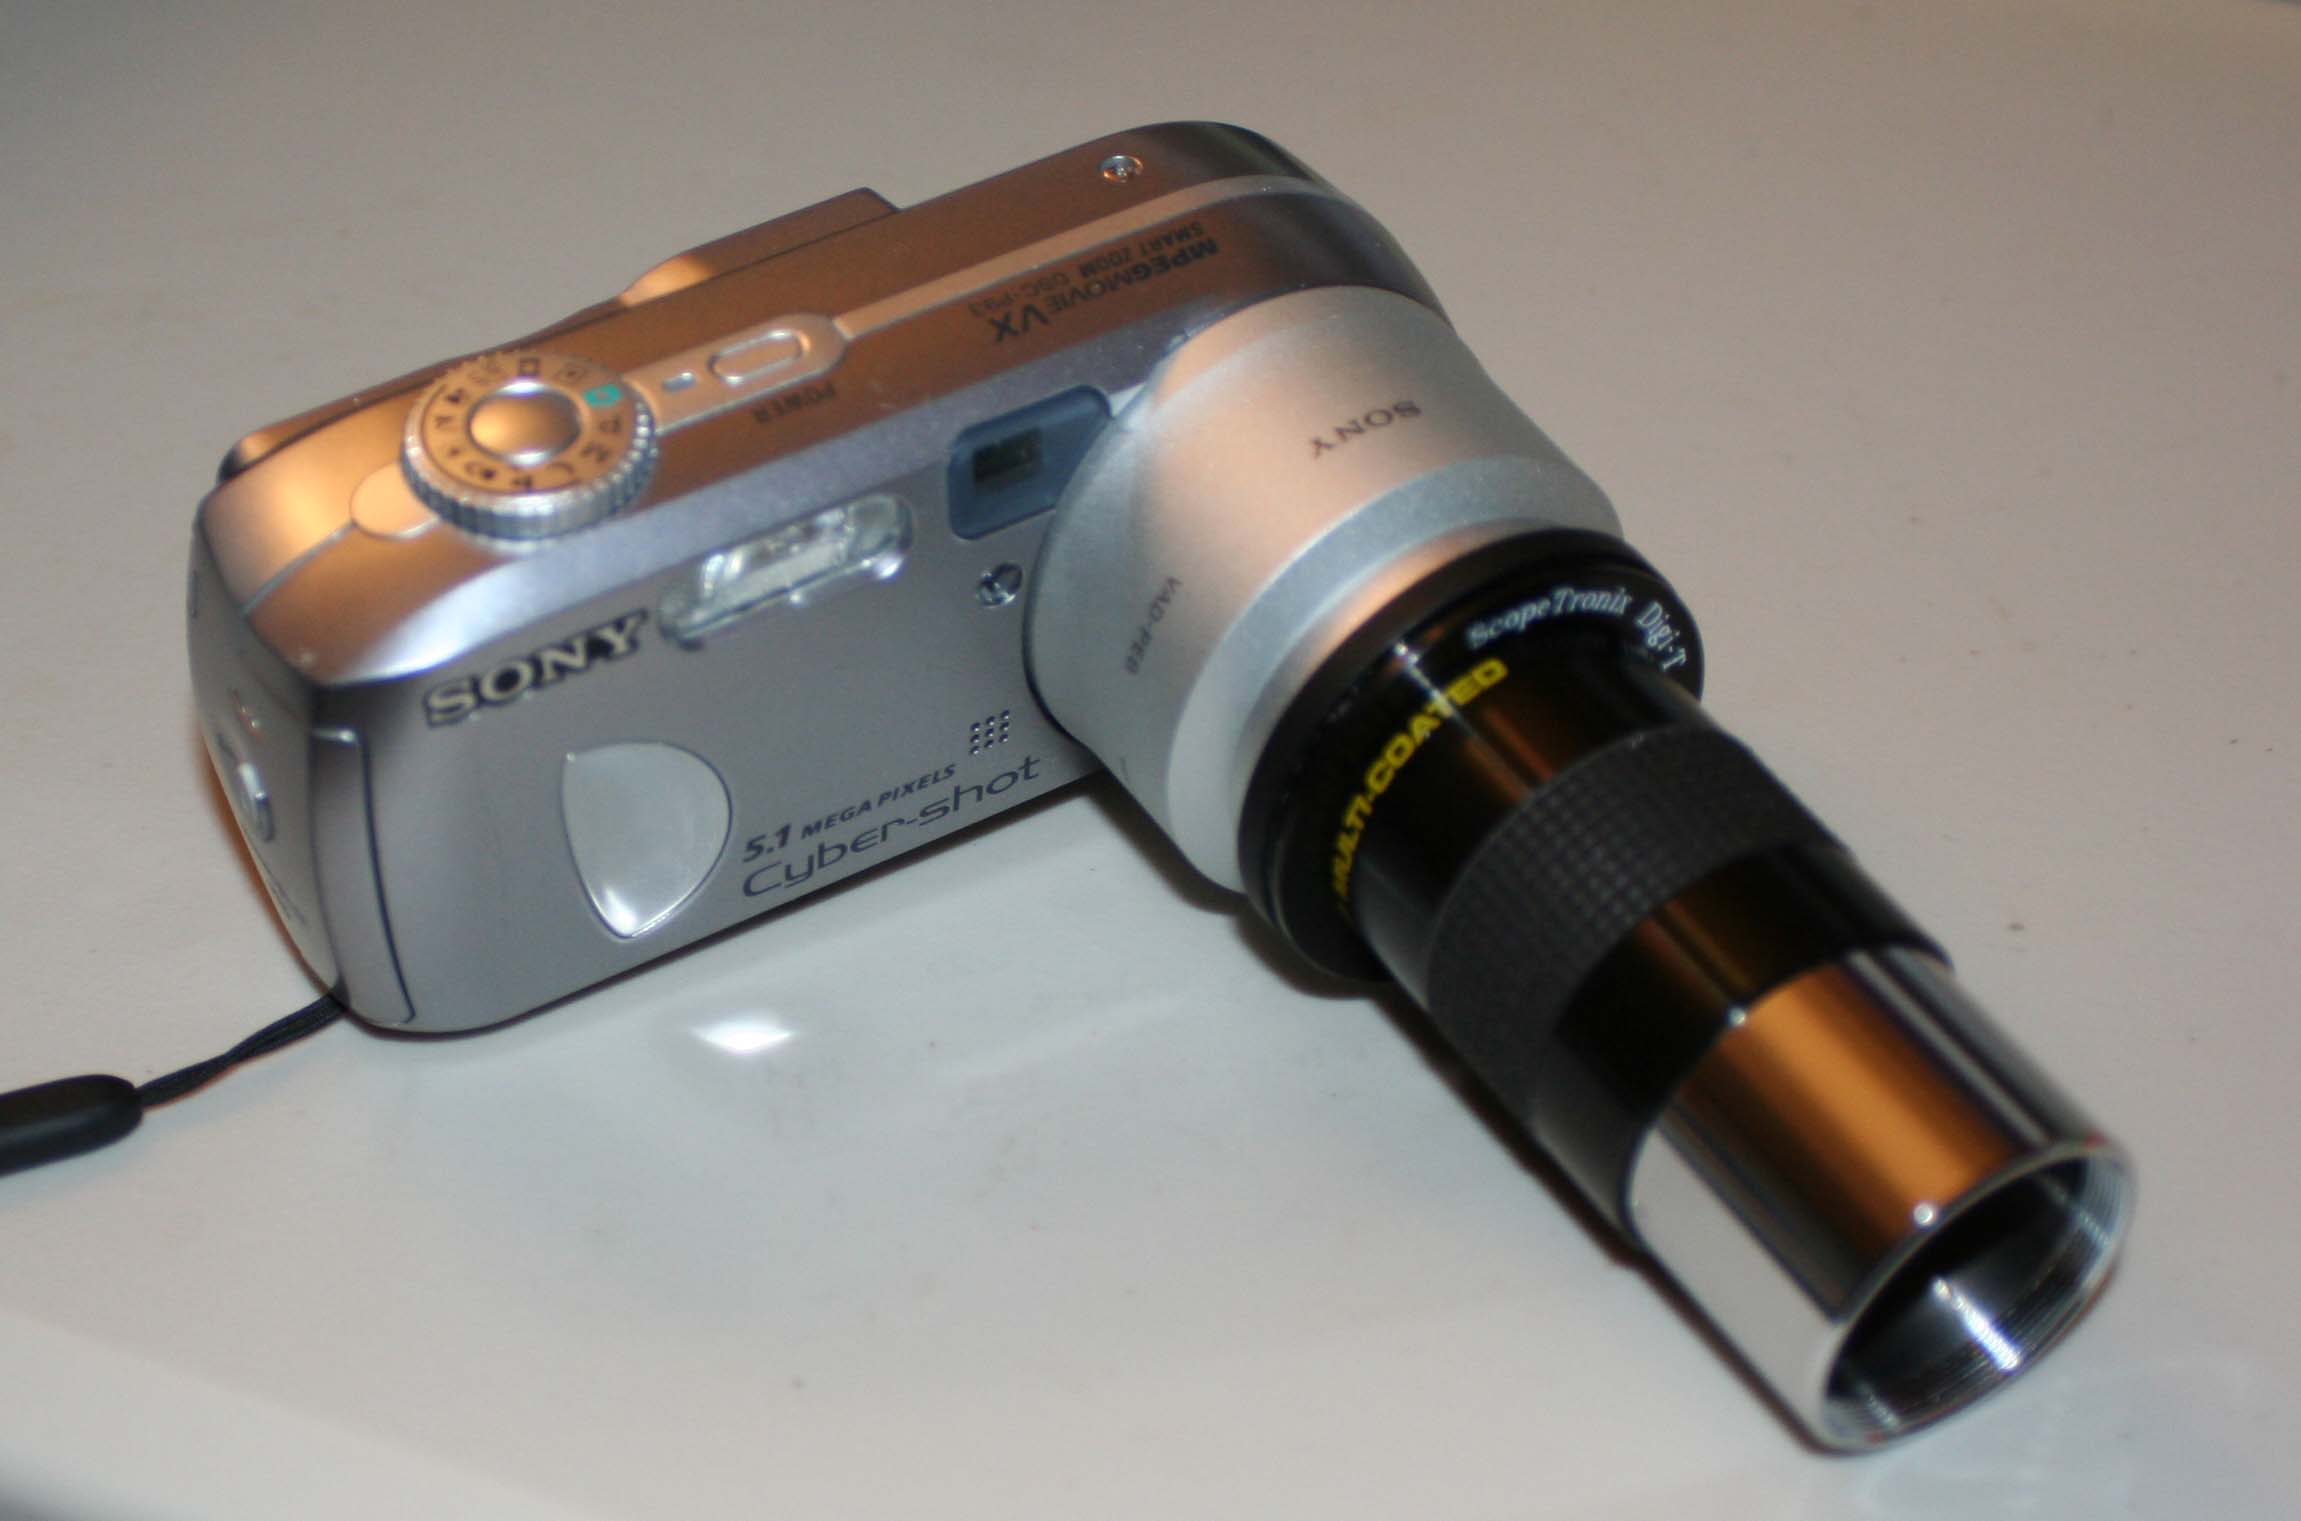
Sony DSC-P93
with Scopetronix adapter
and telescope eyepiece
I use this setup for photographing objects through my telescope. Let me describe what you are looking at.
The camera is a Sony DSC-P93, 5.1 megapixel digital camera.
- This photo shows the camera fully assembled with adapters and an eyepiece attached. With this configuration, the eyepiece barrel (the silver part of the eyepeice in the bottom right corner of the photo) slides into the eyepiece mount of the scope's focuser.
- On the front of this camera, around the lens, is a plastic ring that twists off to reveal a bayonet mount so accessories can be mounted onto the camera. The details of mounts vary from camera to camera. You need a "Digital-T" adapter made to fit your camera. I purchased a "Digital-T" adapter from Scopetronix. UPDATE: As of late 2015, Scopetronix is no longer in business and I have found no other source for the adapters for this camera. I did find one T-ring adapter for sale on eBay from a source in China. I used this small digital camera instead of my big Canon EOS digital camera because this small camera is lightweight. If I mount a heavy digital SLR camera onto my telescope, the added weight pulls the scope tube down to horizontal.
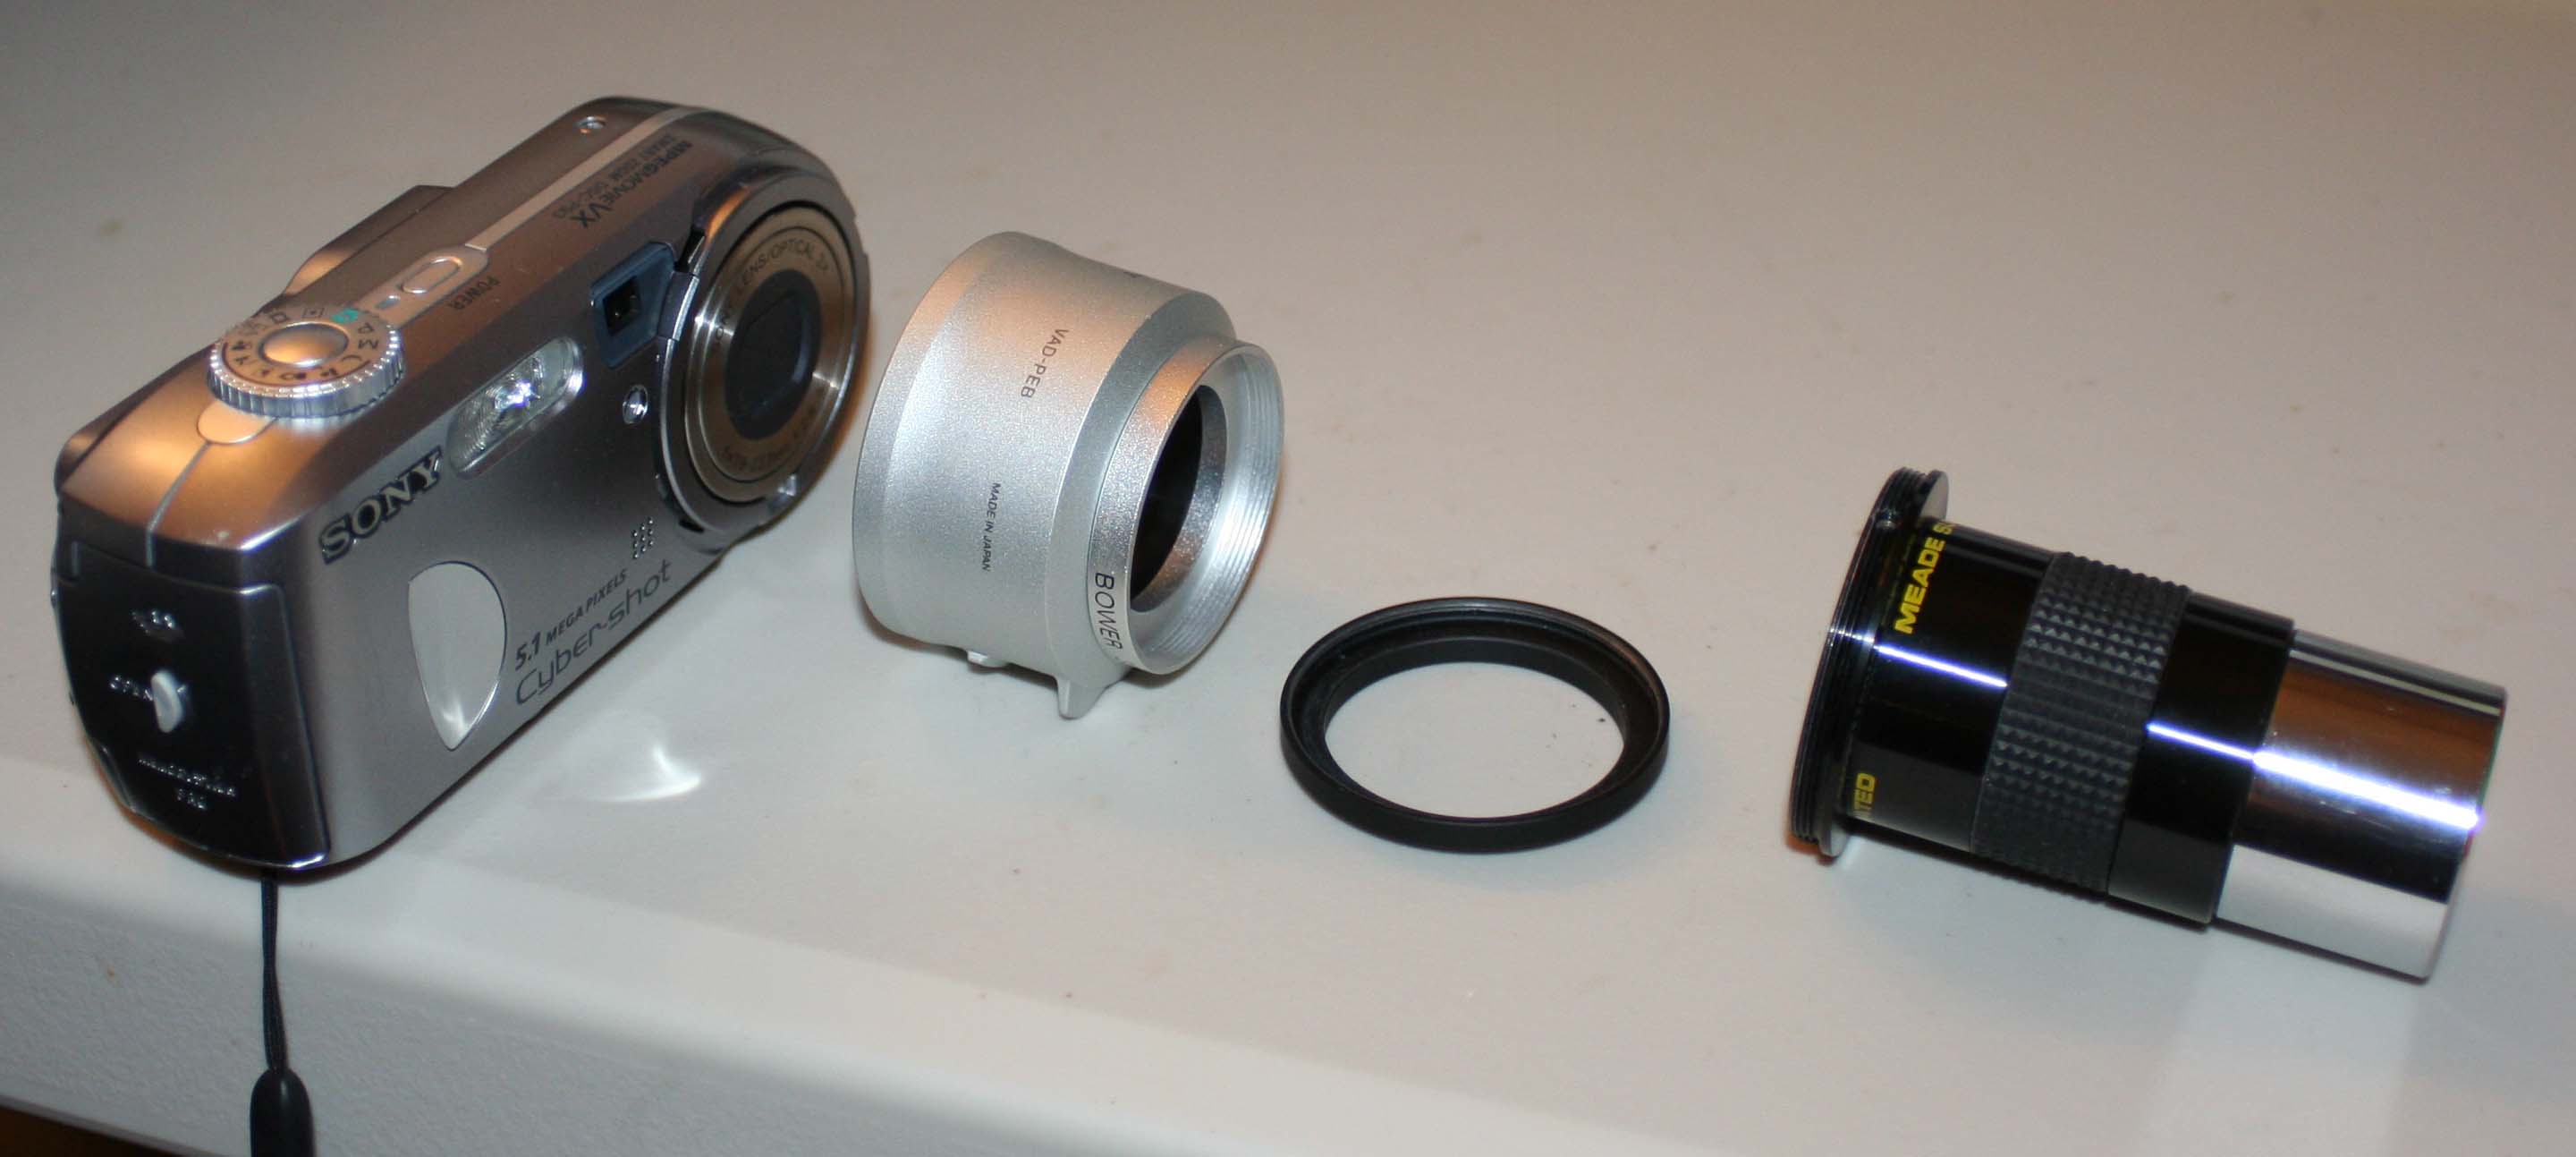
The photo below shows the camera, eyepiece, and adapters disassembled. Here's a description of the system -- read from left to right -- from the camera to the right:
- First is the camera. The ring covering the bayonet mount has been removed.
- To the right of the camera is a large greyish-silver device -- this is the T-ring adapter made specifically for this camera. The end closest to the camera twists into the bayonet mount. The end of this adapter that is away from the camera has fine threads.
- Moving to the right is a thin black ring lying flat. This as a step ring -- one end screws into the threads in the T-ring adapter, the other end accepts the threads on the Digi-T eyepiece ring.
- The next item to the right is an eyepiece with a Digi-T eyepiece ring attached. Move down to the next photos to see how the Digi-T eyepiece ring attaches to an eyepiece.
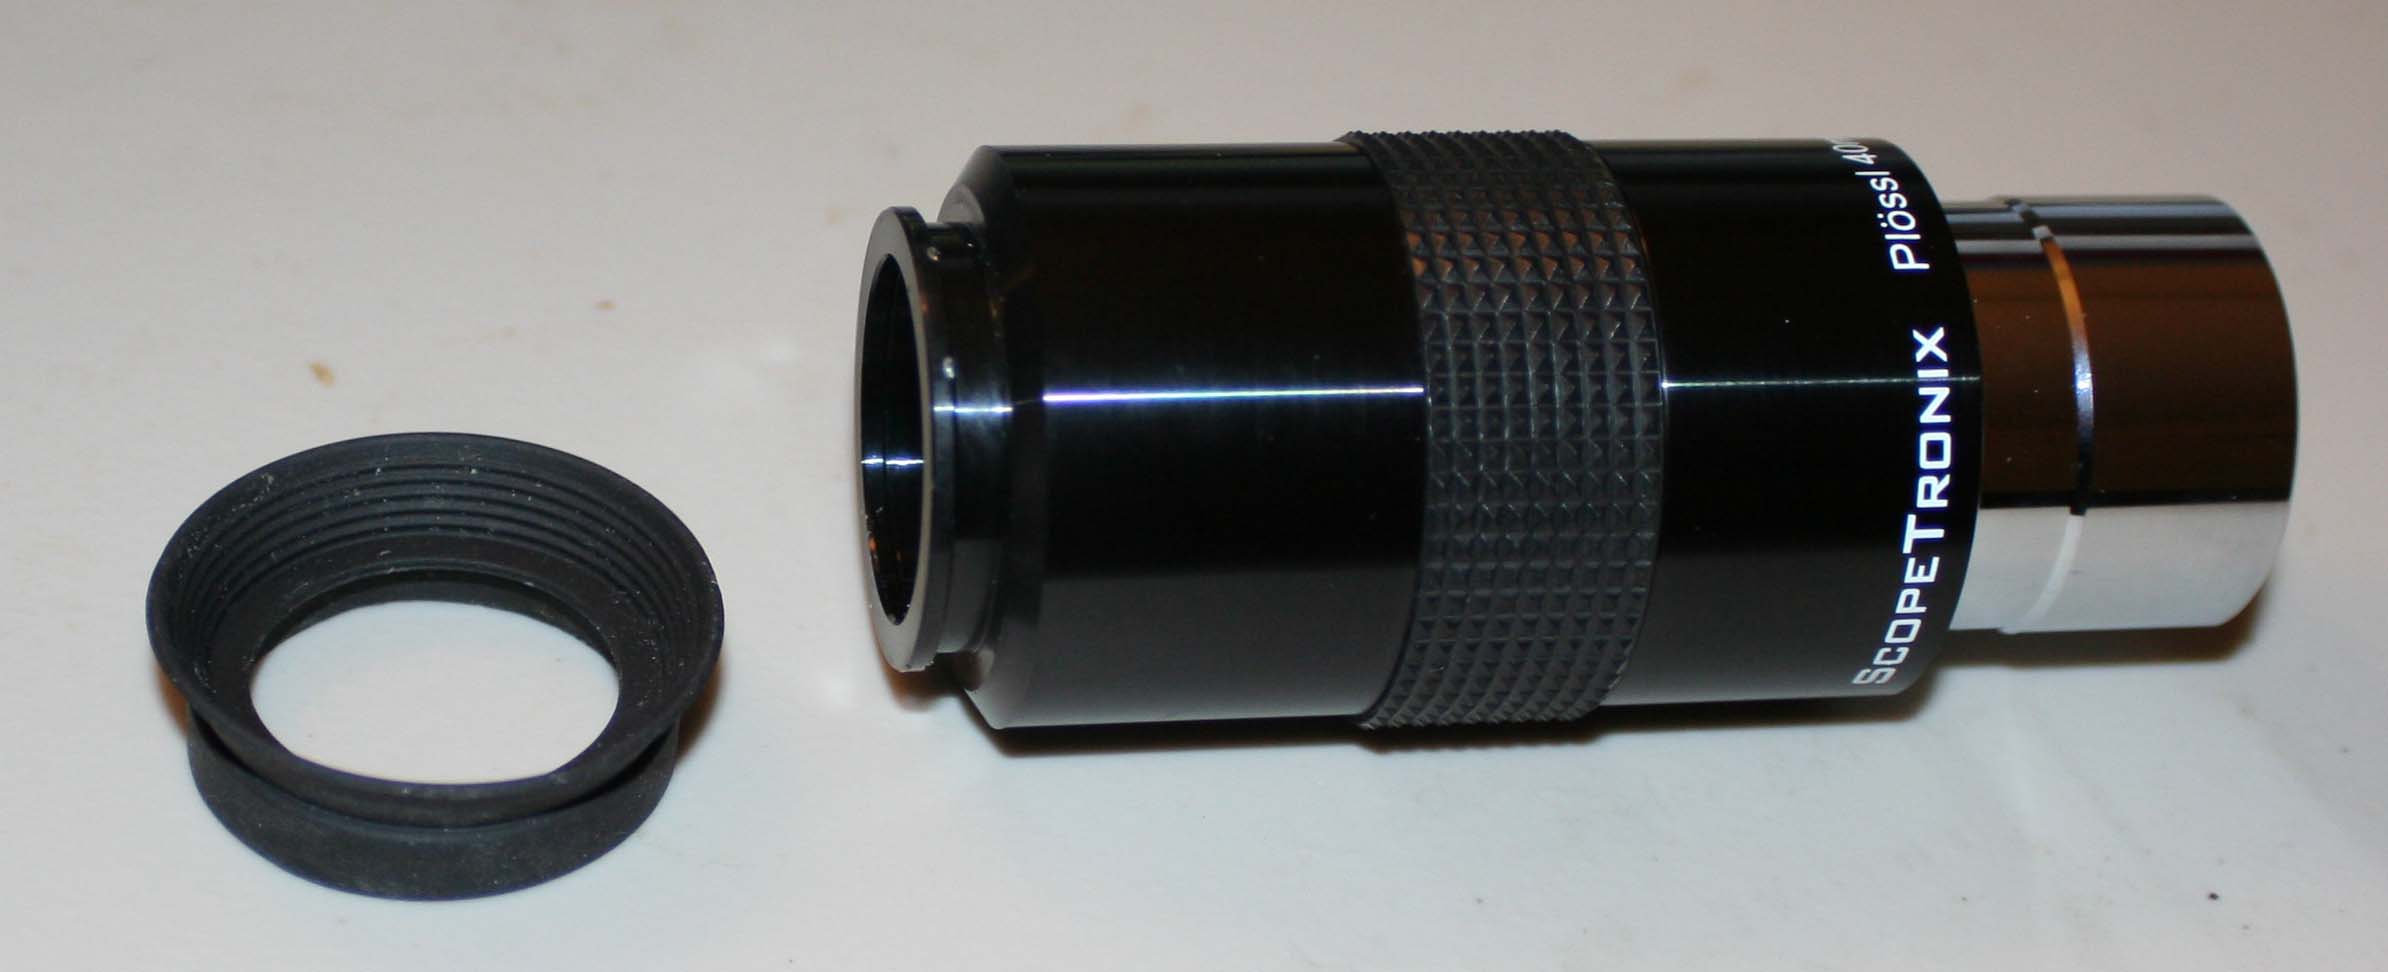
Here is a series of photos that show how to attach the Digi-T eyepiece ring to an eyepiece.
First, here's an eyepiece in normal configuration -- on the right end is the eyepiece barrel that slides into the telescope's focuser. On the left end is the rubber eyecup -- you look through this end of the eyepiece.

The rubber cup can be pulled off easily. Removing the rubber eyecup does not damage anything -- you can pull it off and slip it back on with no problem. Here's what the eyepiece looks like with the rubber eyecup removed.
Note the end of the eyepiece where the rubber eyecup was removed -- there's a lip around the plastic housing with a groove where the rubber eyecup seats. The Digi-T eyepiece ring is a metal ring with threads and three tiny setscrews. Check out the next photo.
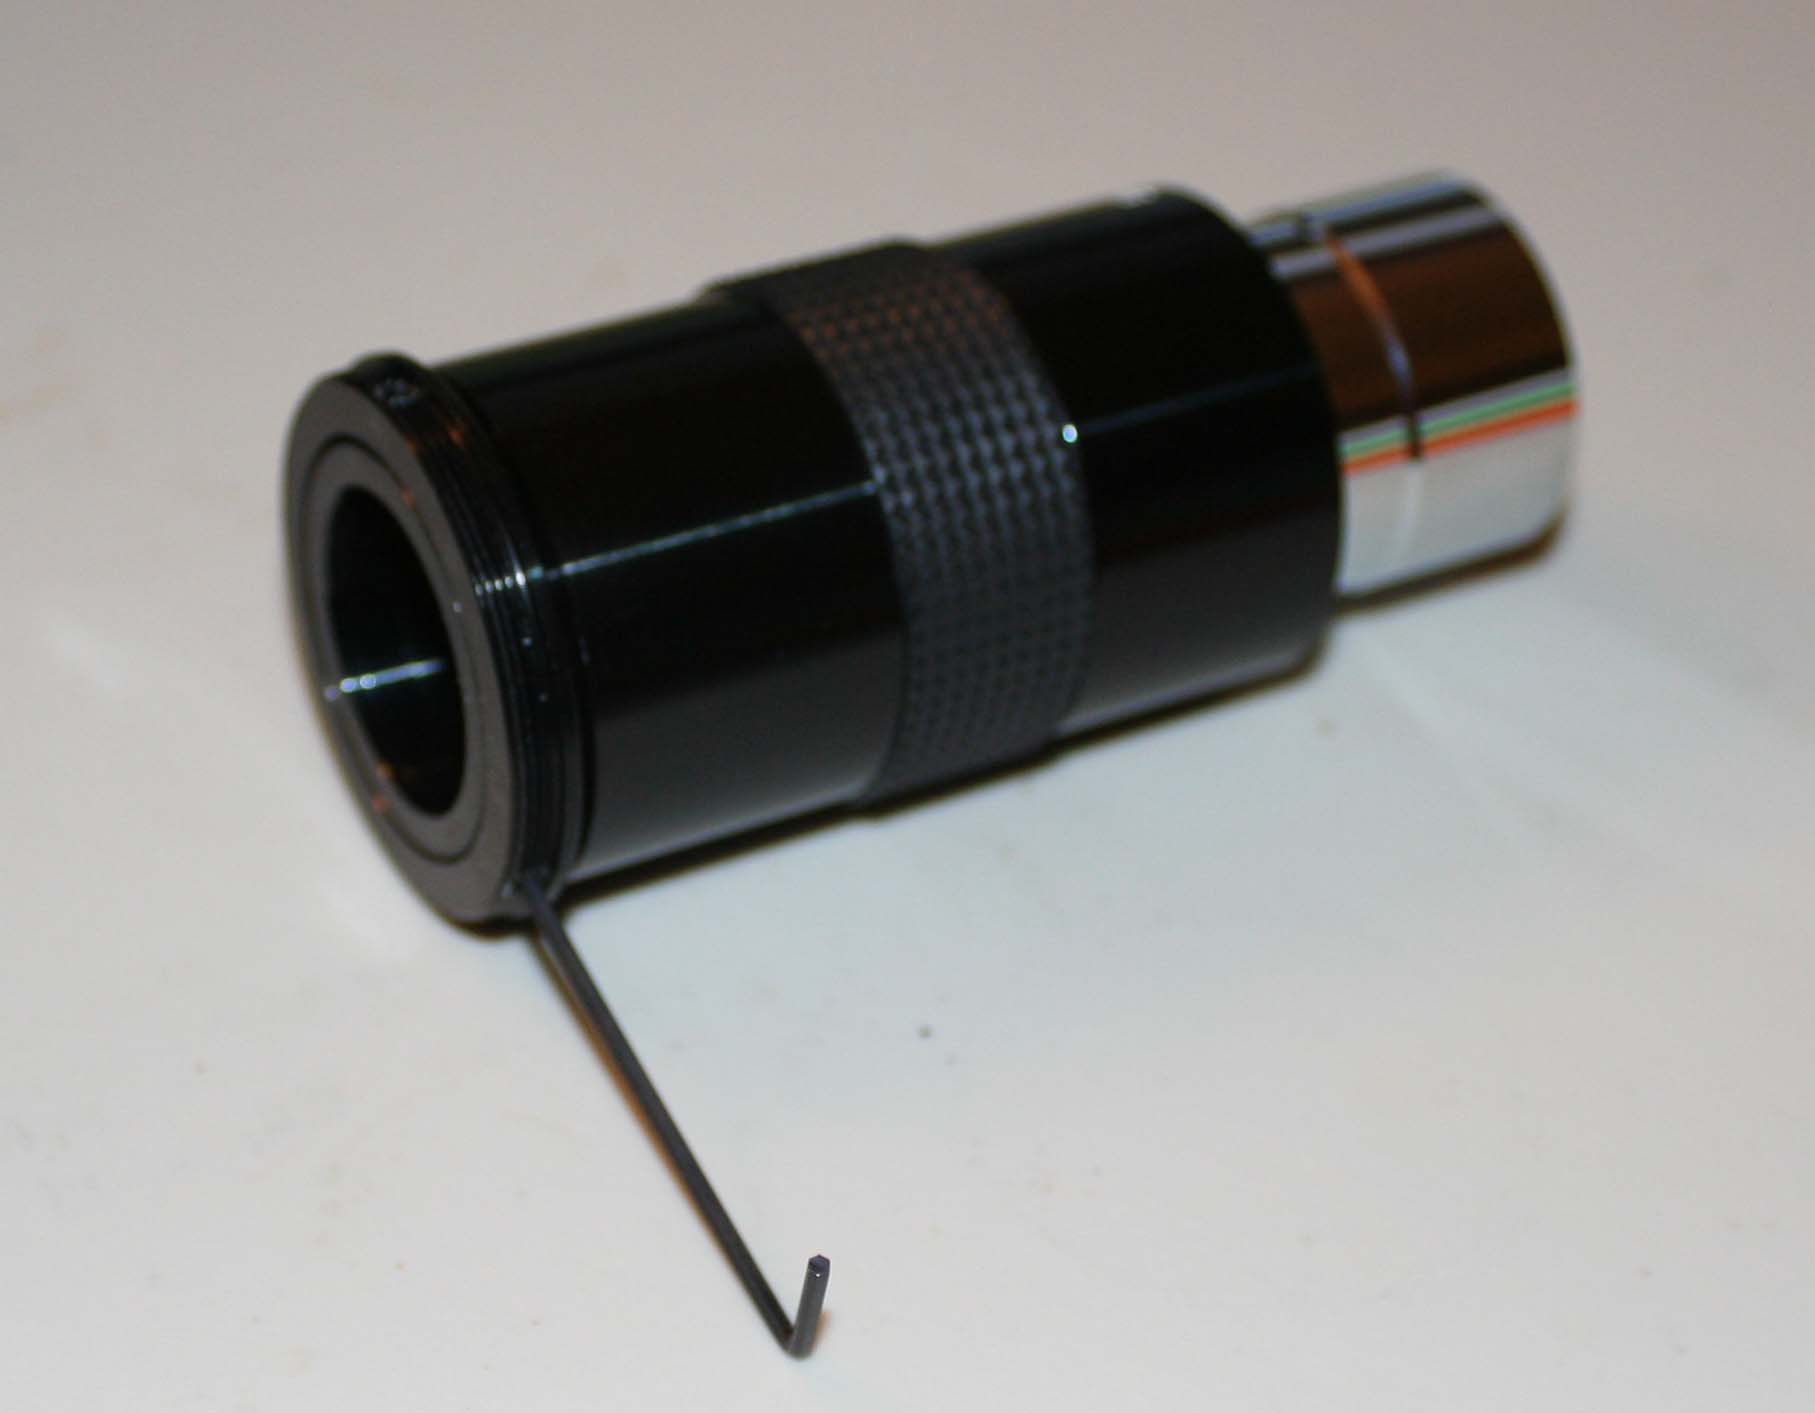
The Digi-T eyepiece ring slips over the lip where the rubber eyepiece cup normally is mounted. The three setscrews are set around the Digi-T eyepiece ring and they are tightened down against the eyepiece using the supplied hex wrench, as shown here. Note the threads in the Digi-T eyepiece ring -- those threads then screw into the adapter ring shown above.
And here, again, is the photo of the system assembled -- just slide the eyepiece into the scope as normal -- except that there's now a camera attached to the eyepiece. I purchased three Digi-T eyepiece rings and put one one each of three eyepieces -- 40mm, 26mm, and 12.6mm -- this gives me a variety of magnifications.

To use the camera with the adapter:
- Turn the camera on. Turn the flash OFF.
- Go to your telescope and insert this eyepiece into the scope as you do any other eyepiece.
- Now, instead of looking through an eyepiece with your eye, you look at the LCD screen on the back of the camera and it shows you what you are seeing through the scope.
- I focus the camera on infinity and focus the scope while watching the LCD screen. When the object you want to photograph is in focus on the LCD screen, press the camera's button to take the picture.
Let me warn you of two points:
- This is a VERY simple method of astrophotography and it takes some "fiddling" with it to get decent photos.
- You WILL NOT get big, splashy, colorful photos that take your breath away. You will get only simply photos, most of which are not usable.
Here are some of my lessons learned.
- Half your photos will be useless -- out of focus; when you pushed the camera button you bumped the scope and the photo is jiggly; the object you're photographing is too small.
- Most of these cameras have an automatic-off feature -- if you don't shoot within a few minutes of turning it on, the camera automatically turns itself off -- just when you want to take a photo.
- I have tried focusing the scope by looking through an eyepiece as normal, then, quickly pulling out the eyepiece, slapping the camera into the scope, and shooting -- sometimes it works.
- Try different eyepieces with the adapter -- you'll get different magnification.
- You can try photographing nebulae and other faint fuzzy objects but don't expect to see anything on the finished product -- just too faint and fuzzy.
- Your best objects are the moon (which you can shoot through all its phases); Saturn (especially when the rings are turned toward you); Jupiter (especially when it's near opposition; try to get as many of the Galilean moons as possible arrayed around Jupiter); Venus (especially when it's in a crescent phase). I have not tried taking photos of clustered objects as the Pleiades or the Beehive Cluster -- should work if you use a wide-angle eyepiece to get the whole cluster in the field of view
- When buying a camera, if possible, get one with a remote control -- that way, you can trip the camera without touching it thus avoiding "bumping" the scope and making it jiggle, which results in a ruined photo.
- Don't get discouraged -- after several failures you'll get a photo you can be proud of.
- Remember: You will NOT get photos like those from the Hubble or photos like those made by other people who are using CCD imagers, tracking mounts for their scopes, and stacking software to process the photos.
If you think you'd like to try this simple method of astrophotography, I recommend you FIRST check the Scopetronix website or catalog to see which cameras their adapters fit, THEN, go shopping for a camera.
| Back to Astrophotography intro page. |