Newtonian Collimation --
Page Two
Now that we have looked at the tools, let's talk about the process of collimation. I assume you have printed and studied the three articles linked from page one; if not, go back to page one and do that.
The process
Collimating a Newtonian reflector is done in a specific order (the Dob is a Newtonian reflector on a Dobsonian mount, as opposed to a tripod or equatorial mount) . Do not violate this order.
Telescope parts
From this point on, I assume you are familiar enough with your scope to know these terms and to know where these things are found:
- Spider
- Tube, or, Optical Tube Assembly, or, OTA (I say "tube")
- Secondary mirror
- Secondary mirror mount
- Primary mirror
- Primary mirror center spot. If your primary mirror does not have a dot or circle in the dead center, you will have to put one there. I am not going into how to do that -- read the other articles.
- Focuser mount
- Eyepiece opening in the focuser mount
Setting up to collimate
- Collimate with the mirror cool. I keep my scope in my garage so that's not a problem -- I just collimate in the garage. You are adjusting the mirrors and you need to adjust them at operating temperature, which is cooled down.
- Have a source of diffuse light, not bright, blinding light. I open the garage door, set the scope in the back of the garage, and aim it at the door thereby bringing in diffuse sunlight.
- If you want to collimate at night, set up a light source -- a lamp works fine -- at one end of the garage and aim the scope at the light.
- Collect your tools -- see the list below.
This is the order in which collimation proceeds:
- Center the spider and secondary mirror mount in the tube -- centering the spider will center the secondary mount.
- Insert the sight tube in the eyepiece opening.
- Center the secondary mirror in the sight tube, up, down, and sideways.
- Make the secondary mirror appear perfectly round when viewed through the sight tube.
- Center the REFLECTION of the primary in the secondary.
- Remove the sight tube, insert the collimating eyepiece or the auto-collimator.
- Center the center spot on the primary in the eyepiece.
- Remove the collimating eyepiece. You are finished.
My tricks
Centering the spider
Look at the spider. Note where the secondary mounts onto the spider -- see the Phillip's head screw in the center of the secondary mount? See the cross in the Phillip's head? That's your aiming point. You want the center of the secondary mount -- which is the center of the Phillip's head -- dead center in the tube. You do that by loosening and tightening the arms of the spider. Study the spider for a minute and you will see what I am talking about. Here's a picture.
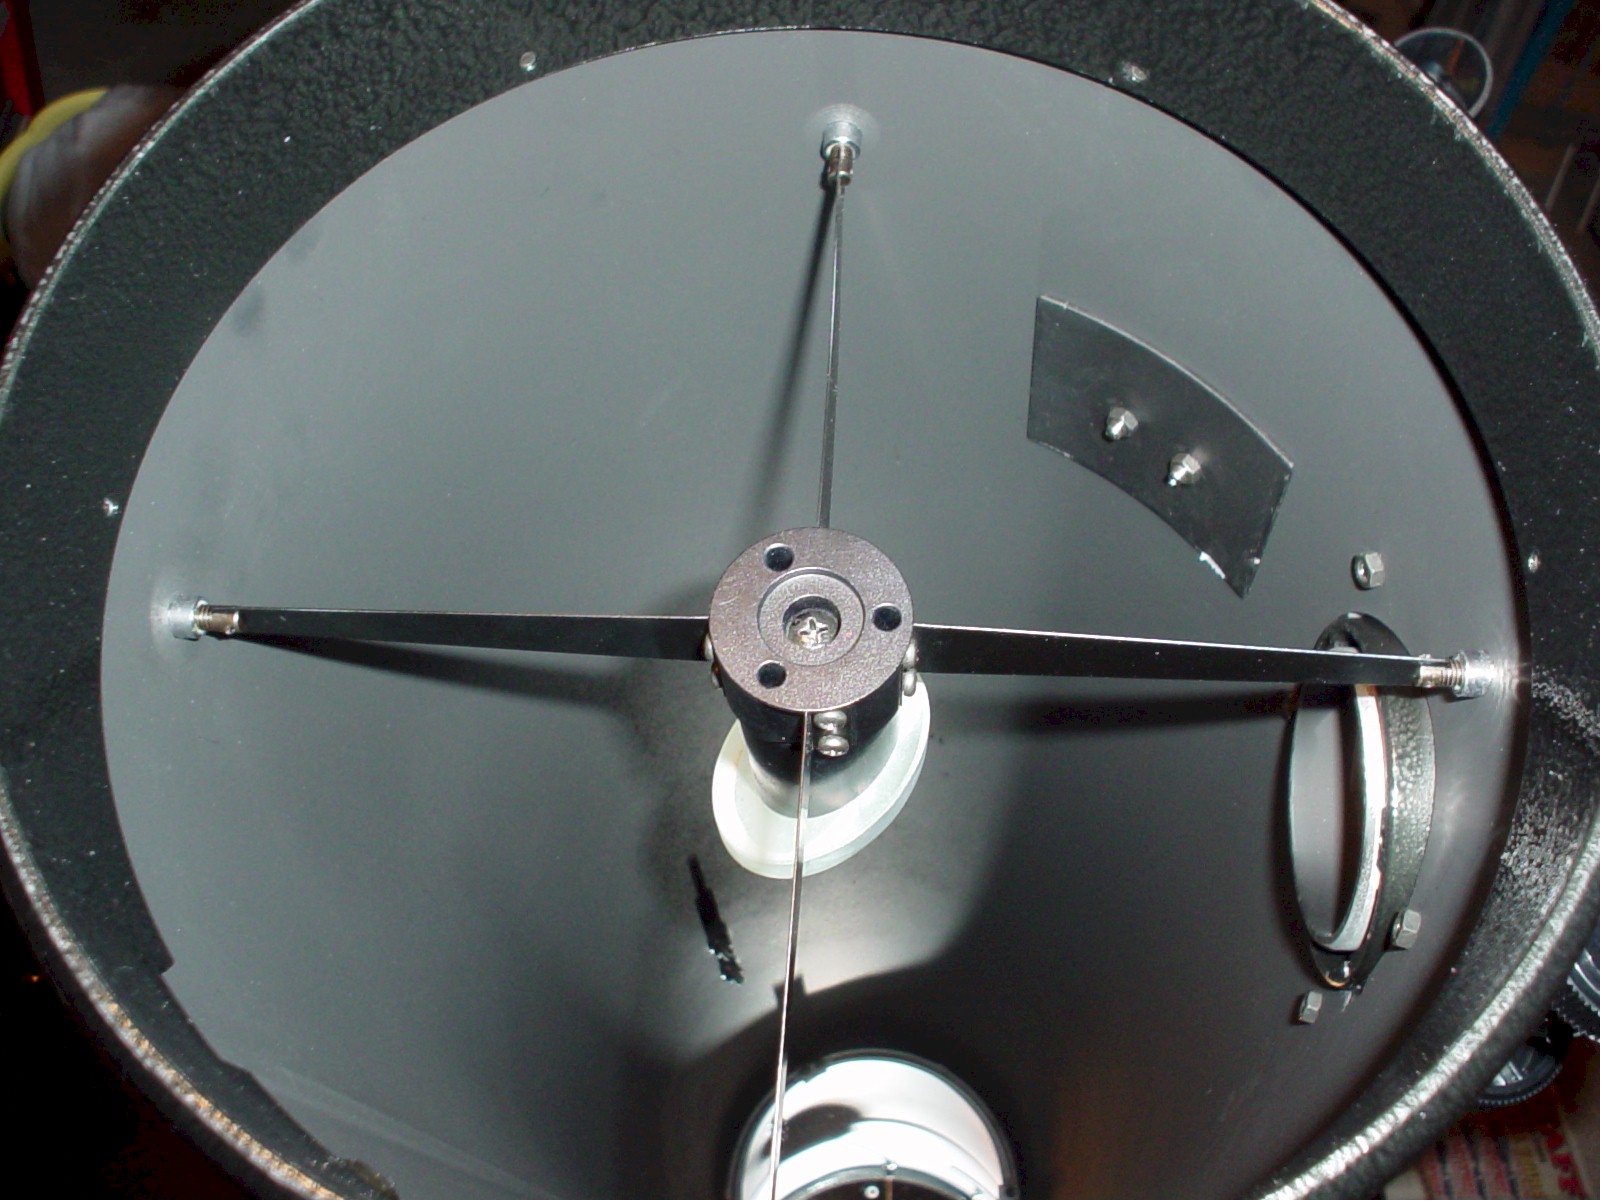
The spider is the four-bar cross arm. The round thing in the center of the spider is the secondary mount -- it has a Phillip's head screw in the center and three 2-mm Allen head screws in the three little holes. The white thing tilted on the bottom of the secondary mount is the secondary mirror. You can touch the edges and the back of the mirror but NEVER TOUCH THE POLISHED FRONT.
On the right side of this photo you see the hole where the focuser mounts. At the bottom of the tube you can see part of the primary mirror.
You must first get the secondary mirror mount dead center in the tube. Note that the spider has screw adjustments on each arm. You loosen and tighten these to move the secondary into the center of the tube. Before you loosen or tighten anything, you need to complete two steps:
- Think.
- Measure.
Think about this: If you want to tighten a spider arm to pull the secondary mount toward one side of the tube, you need first to LOOSEN the opposing spider arm -- unless you want to break or distort the spider arms.
Measure. Don't go moving the secondary mount unless you are certain that it is off-center. You can measure it many ways -- I used a steel ruler to carefully measure from the edge of the tube, along the top of the spider arm, to the center of the Phillip's head screw. You could also use a set of dividers -- in this photo, I stretched my fingers to illustrate where you would place the dividers.
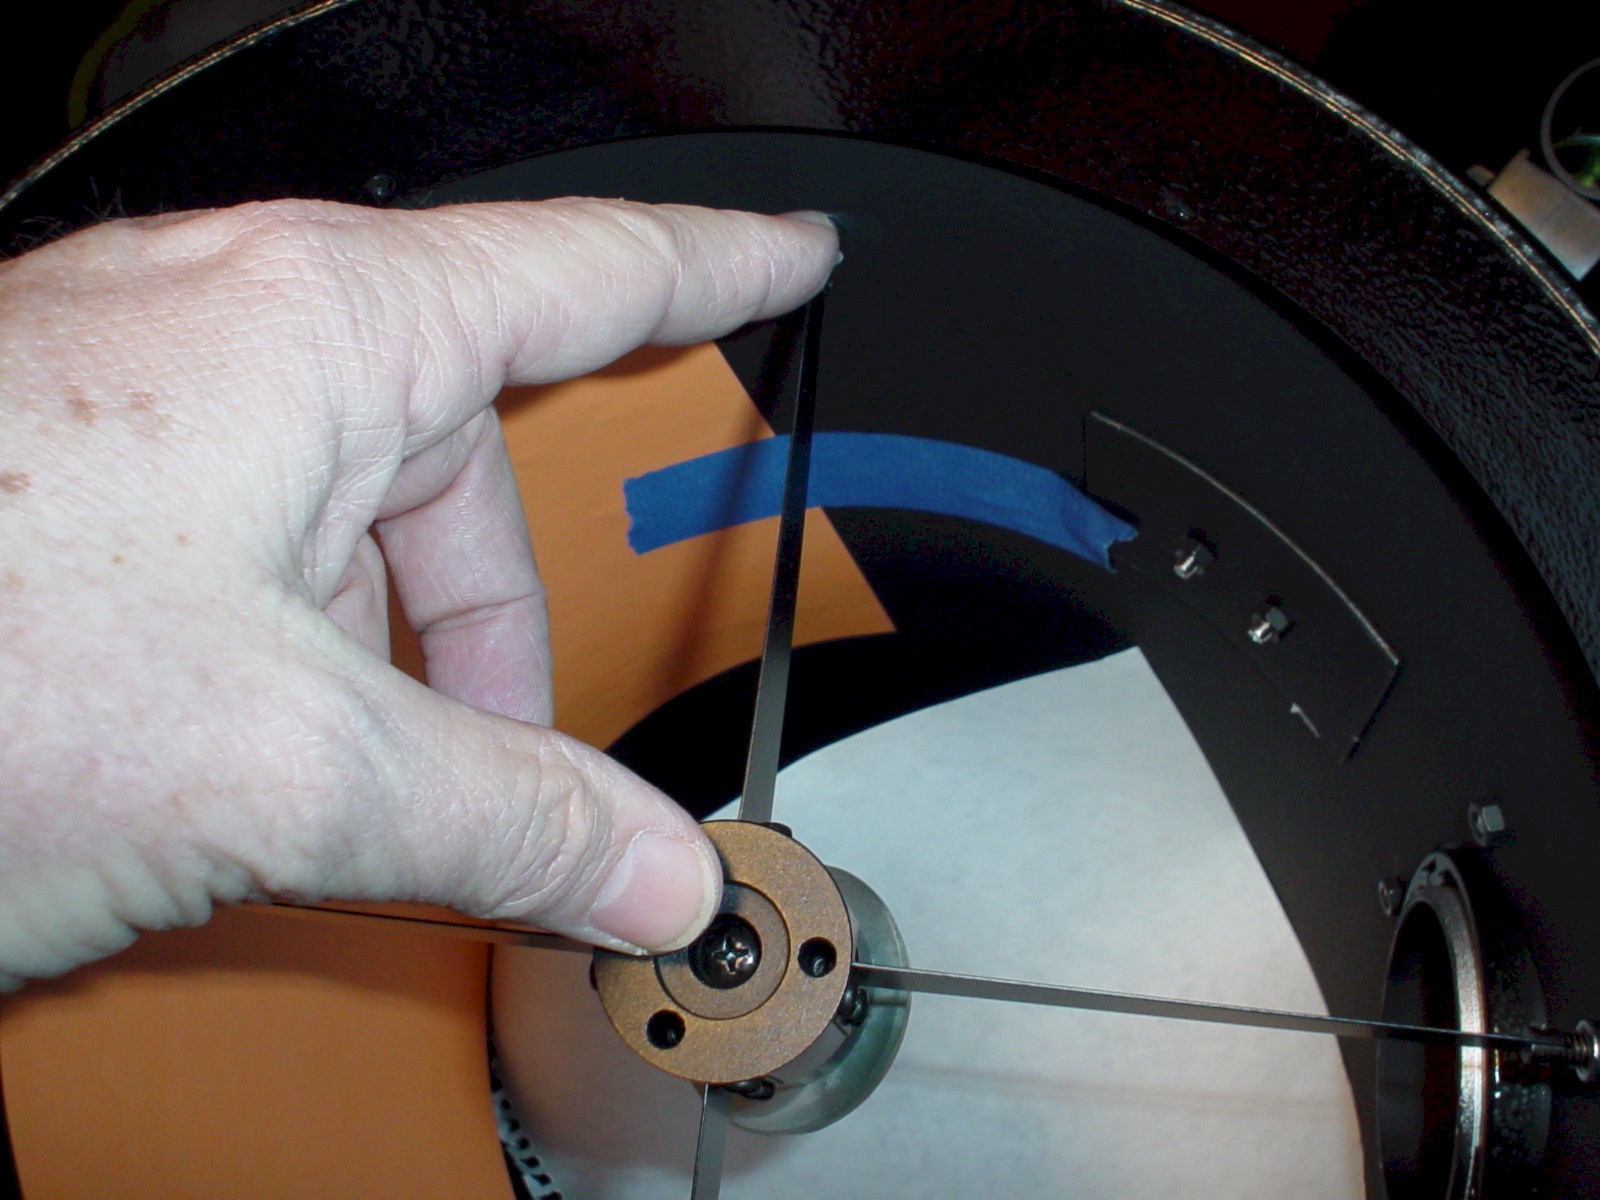
Imagine that instead of my thumb and forefinger you have a mechanical divider or a drafting compass. Put one point in the center of the Phillip's head and the other point where one spider leg joins the tube. Now, check the other spider legs to ensure this distance is equal all the way around. If not, loosen and tighten the spider legs to move the secondary mount dead center in the tube. When this is done, check and re-check. Have someone else double check your work. You should only have to do this once -- although you may want to check it once a year. Disregard the orange and white paper in the tube -- I'll tell you about that in a minute.
Adjusting the secondary mirror
The theory
The secondary mirror is an ellipse set at a 45-degree angle. The light entering the scope goes down the tube and hits the primary mirror. The curve on the primary focuses the light onto the secondary, which shoots the light off at a 90-degree angle out the focuser opening into the eyepiece.
Think about this for a minute. If you look at an ellipse straight ahead, it looks like, well, an ellipse. But, if you tilt one end of the long axis of the ellipse toward you, it gradually rounds until you see a circle. That's what you want your secondary mirror to do -- you want it tilted toward the focuser so when you look through the focuser you see, not an elliptical mirror, but a perfect circle mirror.
The secondary mirror must be centered in two directions: up and down the tube (toward or away from the primary mirror), and, side to side in the tube. AND, it must be tilted on its axis so it is a perfect circle when see through the focuser opening. This is what happens:
- The Phillip's head screw when turned clockwise (CW) moves the secondary DOWN the tube, TOWARD the primary. When you turn it counterclockwise (CCW), it pulls the secondary mirror UP the tube AWAY from the primary. Look at it and think about it.
- The Allen head screws push on the secondary mount and cause it to tilt side to side, making the secondary mirror appear round or elliptical, and making the secondary mirror move from side to side.
The practice
To adjust the secondary mirror, you need these tools:
- A sheet of colored paper -- I recommend Da-Glo orange, yellow, or lime.
- A sheet of white paper
- Three pieces of masking tape, 4-5 inches long each
- Phillip's head screwdriver
- 2mm Allen head wrench
- Your sight tube or collimating eyepiece
To understand why you need the paper, set up to collimate, pull the cover off the scope tube, remove the cover or eyepiece from the eyepiece opening, and look through the eyepiece opening. You will see the most confusing gaggle of sights, reflections, and reflections of reflections you can imagine. You will see the secondary, part of its mount, the far side of the scope tube, the primary reflected in the secondary, the secondary and spider reflected in the primary, and every reflection reflected again -- something like this:
View through focuser opening
You can't tell what you are seeing. Here's how I solved this problem.
For this step, you want to see ONLY the secondary mirror and you want to see it clearly. So, install your two pieces of paper as shown in this photo.
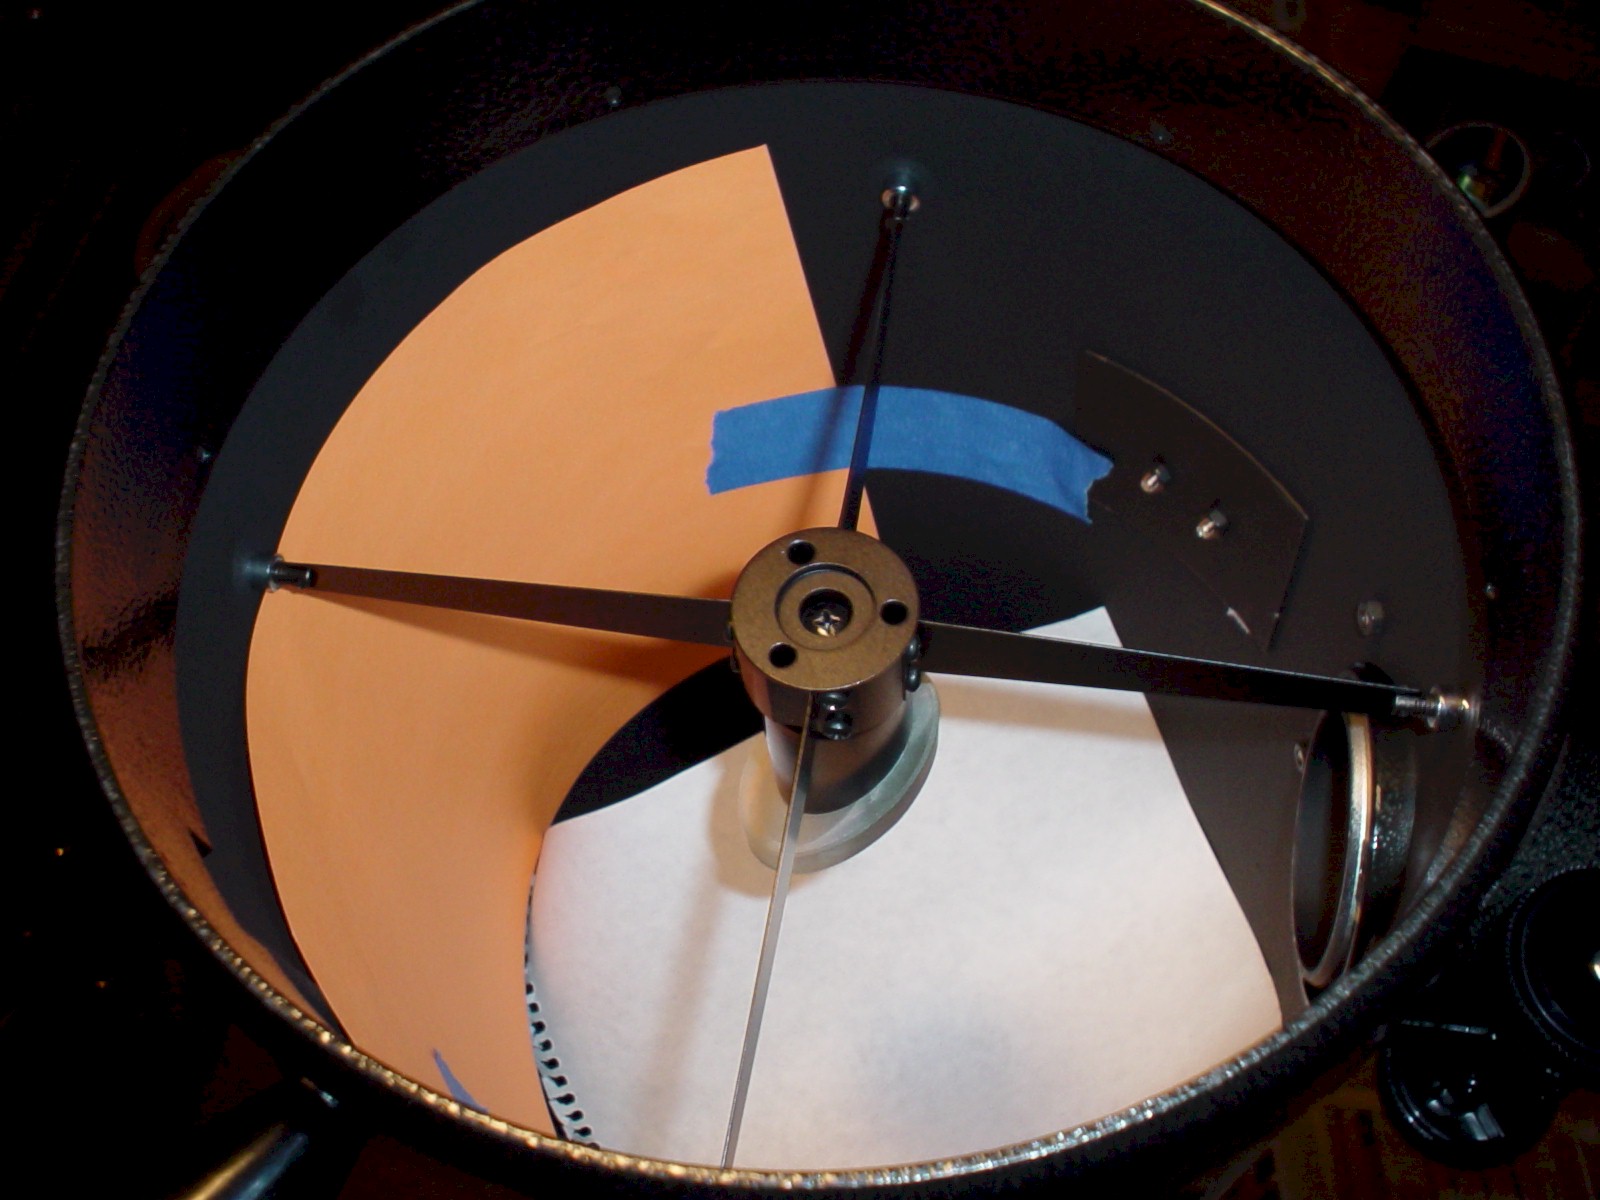
The colored paper has a piece of tape on each end and is taped, curved, onto the inside of the tube directly opposite the focuser opening. The white paper has a piece of tape on one end; stuff it down the tube, tape it to the tube to hold it in place, and lay it across the tube to block the tube. Now, when you look through the focuser opening, this is what you see.
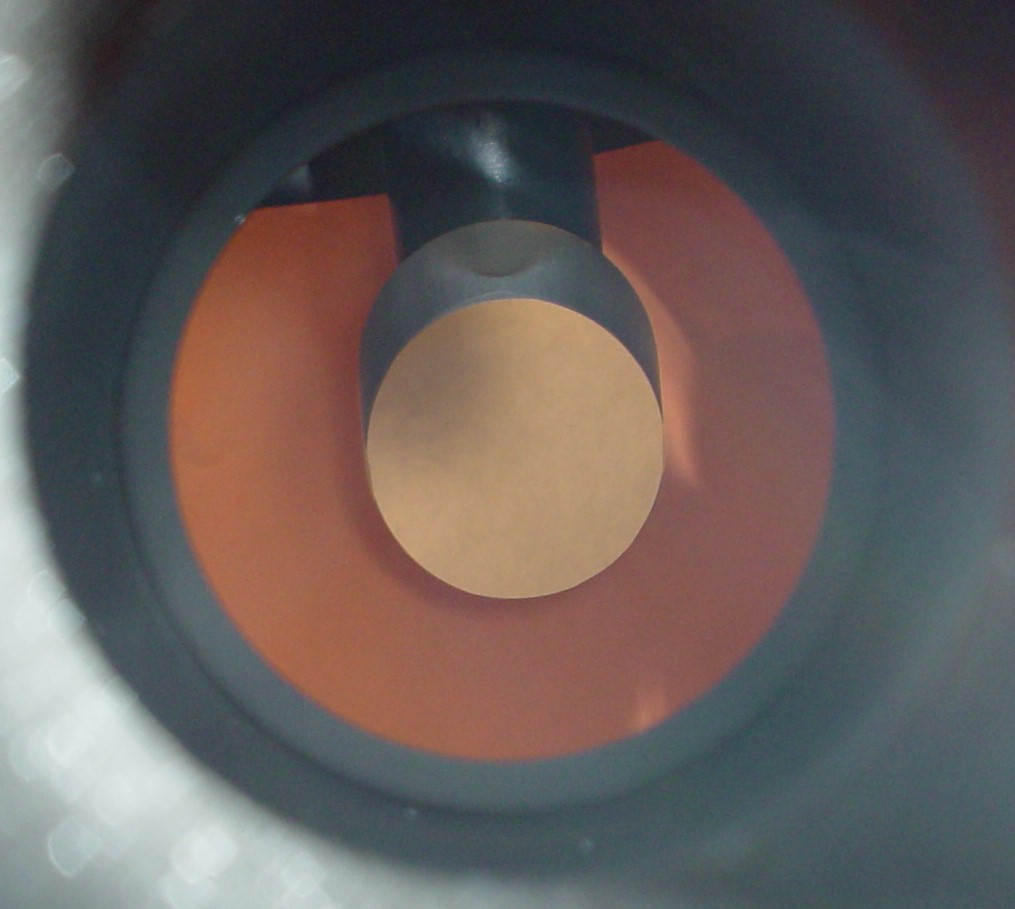
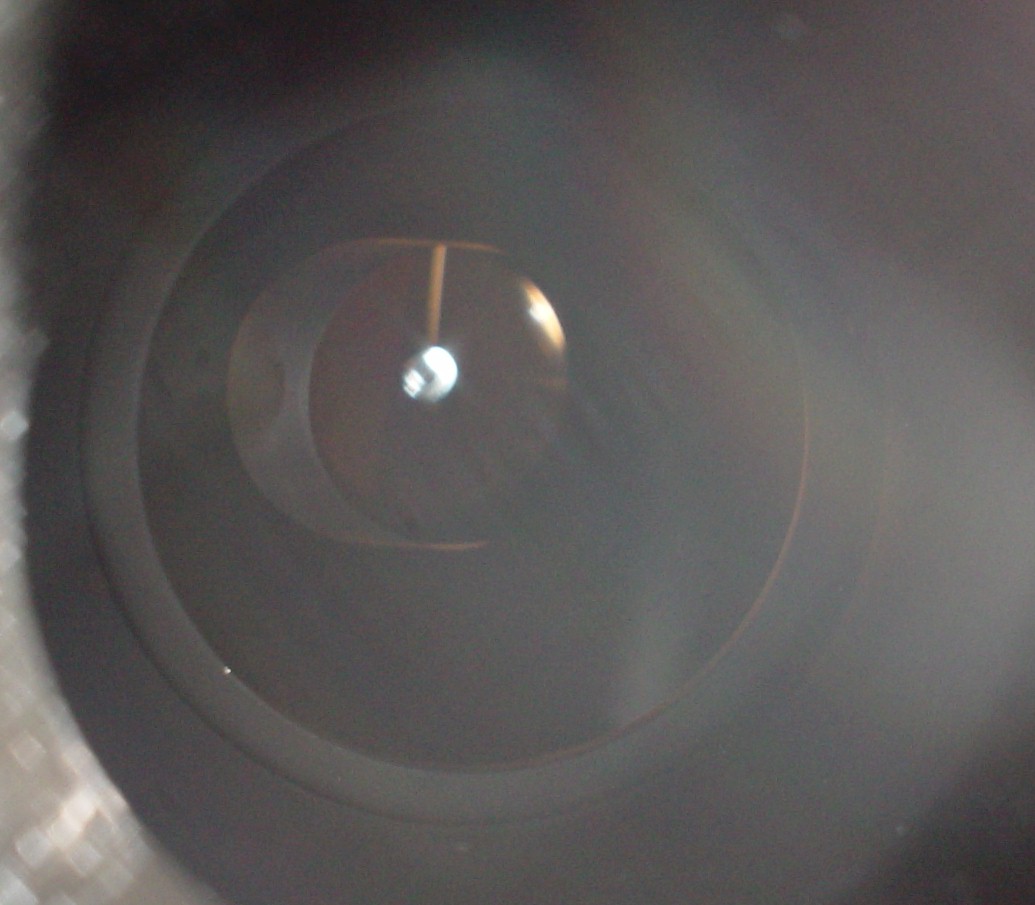
View through focuser opening with paper in place
This is a photo taken looking through the eyepiece opening, no eyepiece or collimating tool in place. See the orange circle -- that's the orange paper taped to the side of the tube. See the circle in the center, it's colored sort of light orange -- that's the secondary mirror. The dark edge on the top is the unpolished edge of the mirror and the shiny black object is the mount. Notice that you can see only the secondary mirror and it stands out against the orange paper -- the orange paper is a much better background than the black tube and the white paper blocks all the confusing reflections. Now, you can concentrate on the secondary mirror.
Okay, that's enough Images for one web page. Let's go to page three and continue with collimation.
| Back to Amateur Astronomy page | |
| Collimation -- Page 1 | Collimation -- Page 3 |