XT-12 Intelliscope:
Modifications to the Scope
and the Handcart
After using my XT-12 for a few days, I realized that I needed to modify the handcart that I used to transport the scope. The scope is big and it really cannot be moved easily while it's assembled. You can take it apart -- pull the OTA off the base and carry the two pieces separately. However, I live in an apartment; outside my front door is a sheltered area under the stairs going to the apartment above us. I leave my scope assembled sitting in this covered alcove. I have a bicycle lock -- a cable with a built-in lock -- that I use to lock the scope to the building so it does not disappear. The scope sits under the stairs where it's sheltered from the rain; it sits on the two-wheel handcart so, when I want to wheel it out to use it, I just unlock the cable and haul the scope out into the lawn.
Here are some modifications I made to the scope and the handcart:
- Added a Telrad unitary finder.
- Added a support cradle to the handcart.
The Telrad
I will not attempt to describe how the Telrad works. It is a "unitary" finder -- it does not magnify the view. The Telrad contains a battery and a series of mirrors -- it projects an image to concentric circles (a bull's eye) onto the sky -- you align the Telrad with the scope then you can look through the Telrad, center the bull's eye on the star or whatever you want to observe, and bingo! -- the scope is pointed at the same object. Here are some more websites that describe the Telrad:
- http://www.backyard-astro.com/equipment/accessories/telrad/telrad.html
- http://www.adorama.com/ATTFS.html
- http://www.atmob.org/Articles/skymaps_jsmall.html
- http://www.handsonoptics.com/fnd_telrad.html
- http://www.solarius.com/msas/findercharts/messier_objects.html
- http://www.astromag.co.uk/pdfs/telrad.pdf
You can order a Telrad from most any astronomy supplier -- I got mine from Scopetronix.
The Telrad comes with a base that has heavy-duty double sided tape on it -- stick it directly onto the OTA as shown in the photo. HOWEVER -- I recommend you first use masking tape to attach the base -- just tape the base onto the scope OTA and move it around until the Telrad is where you want it, then, peel off the protective coating on the double-sided tape and stick the base onto the scope.
Here's a photo of where I mounted the Telrad on my XT-12:

The objects mounted on the scope are, from left to right:
- Focuser. Your eyepieces go into the focuser, you look through the eyepieces and turn the knobs on the focuser to focus your view.
- 9 x 50 right-angle finder. This is a small, 9-power telescope. Use this to find the objects you want to see. The finder has a crosshair in it -- the finder is aligned with the main scope; put the star, planet, whatever you want to see, in the crosshairs and then look through the main scope where the object will be centered in your field of view. Note that this finder has its eyepiece sticking up -- the one that comes with the scope is a straight-through finder and is a little difficult to use. I purchased this 9 x 50 right-angle finder when I bought the scope and I prefer it to the straight-through finder that is standard with the XT-12.
- Telrad. Already described the Telrad.
Modifications to the handcart
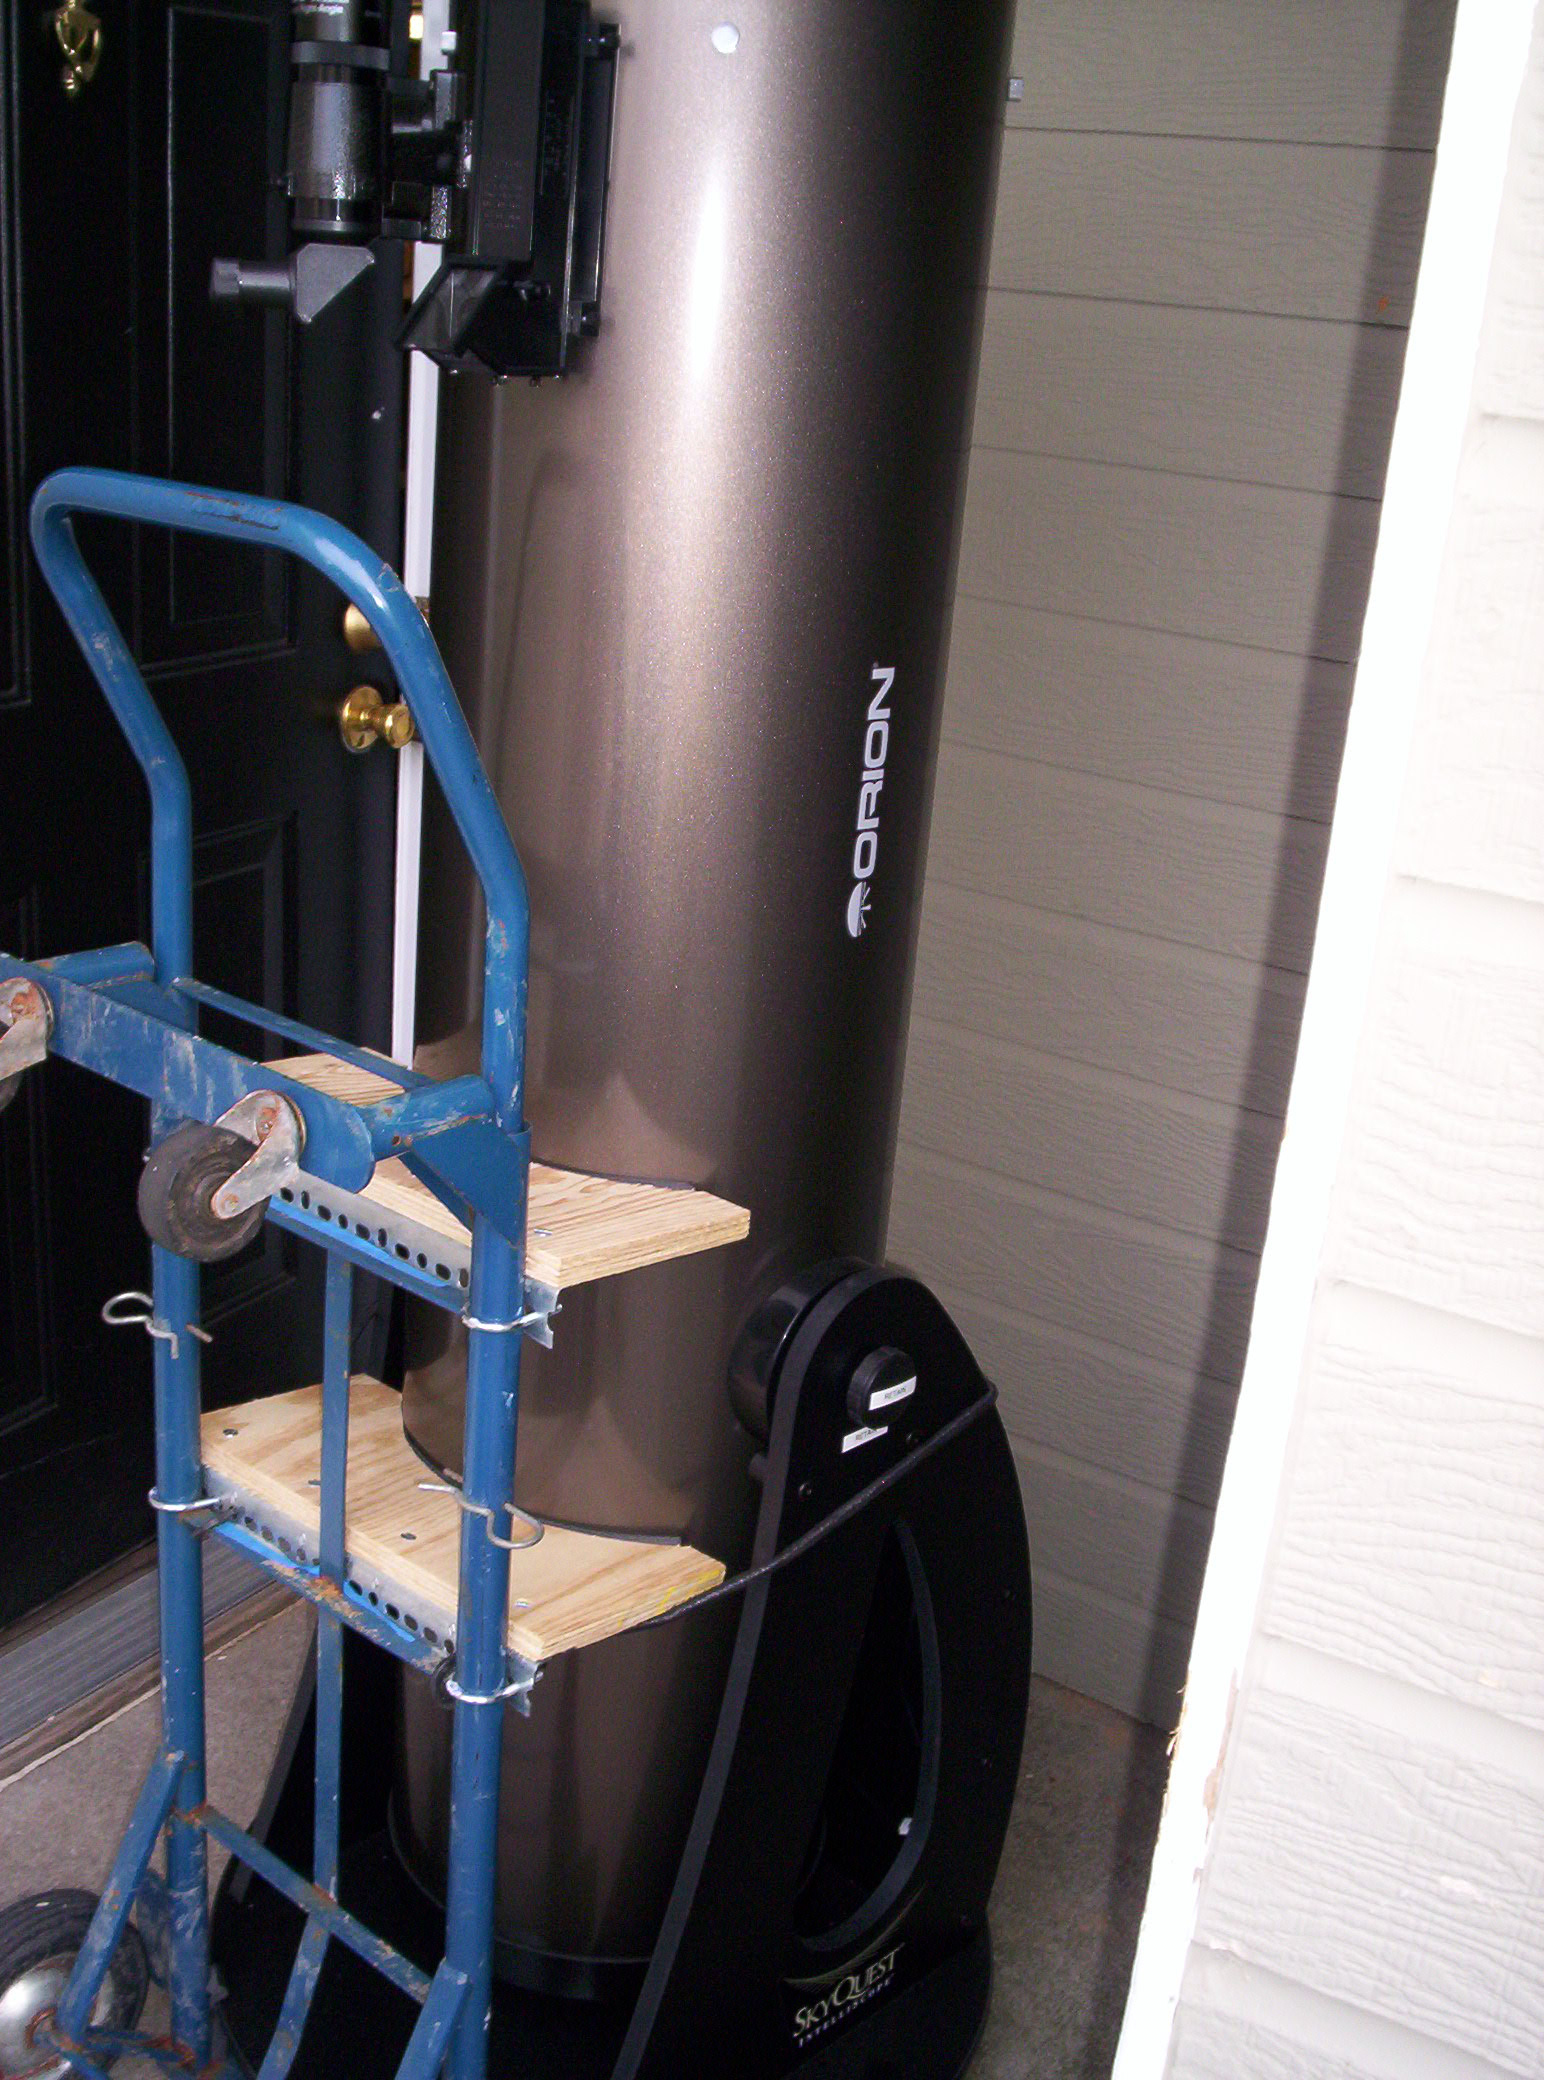
After using the handcart to move the scope a couple of times, I realized that the handcart needed a cradle to support the scope, and, I needed to use a bungee to hold the scope onto the cart. Here are self-explanatory photos showing the construction of the cradle. In these photos you will see that the handcart is rusty -- it was under 20 feet of salt water during Hurricane Katrina and was one of the few things we were able to salvage.
In this first photo you see the cradle attached to the cart. The cradle is two pieces or 3/4-inch plywood; one edge is cut with a circular shape to match the curve of the scope (use the scope's dust cover as a template). The two pieces of plywood are bolted to two pieces of steel angle iron which, in turn, are bolted to the cart with four U-bolts. When I move the scope, I just tip the handcart back, as you normally use the handcart, and the scope settles down onto the cradle -- I wrap a bungee around the scope and hook the bungee to the handcart just to be safe.
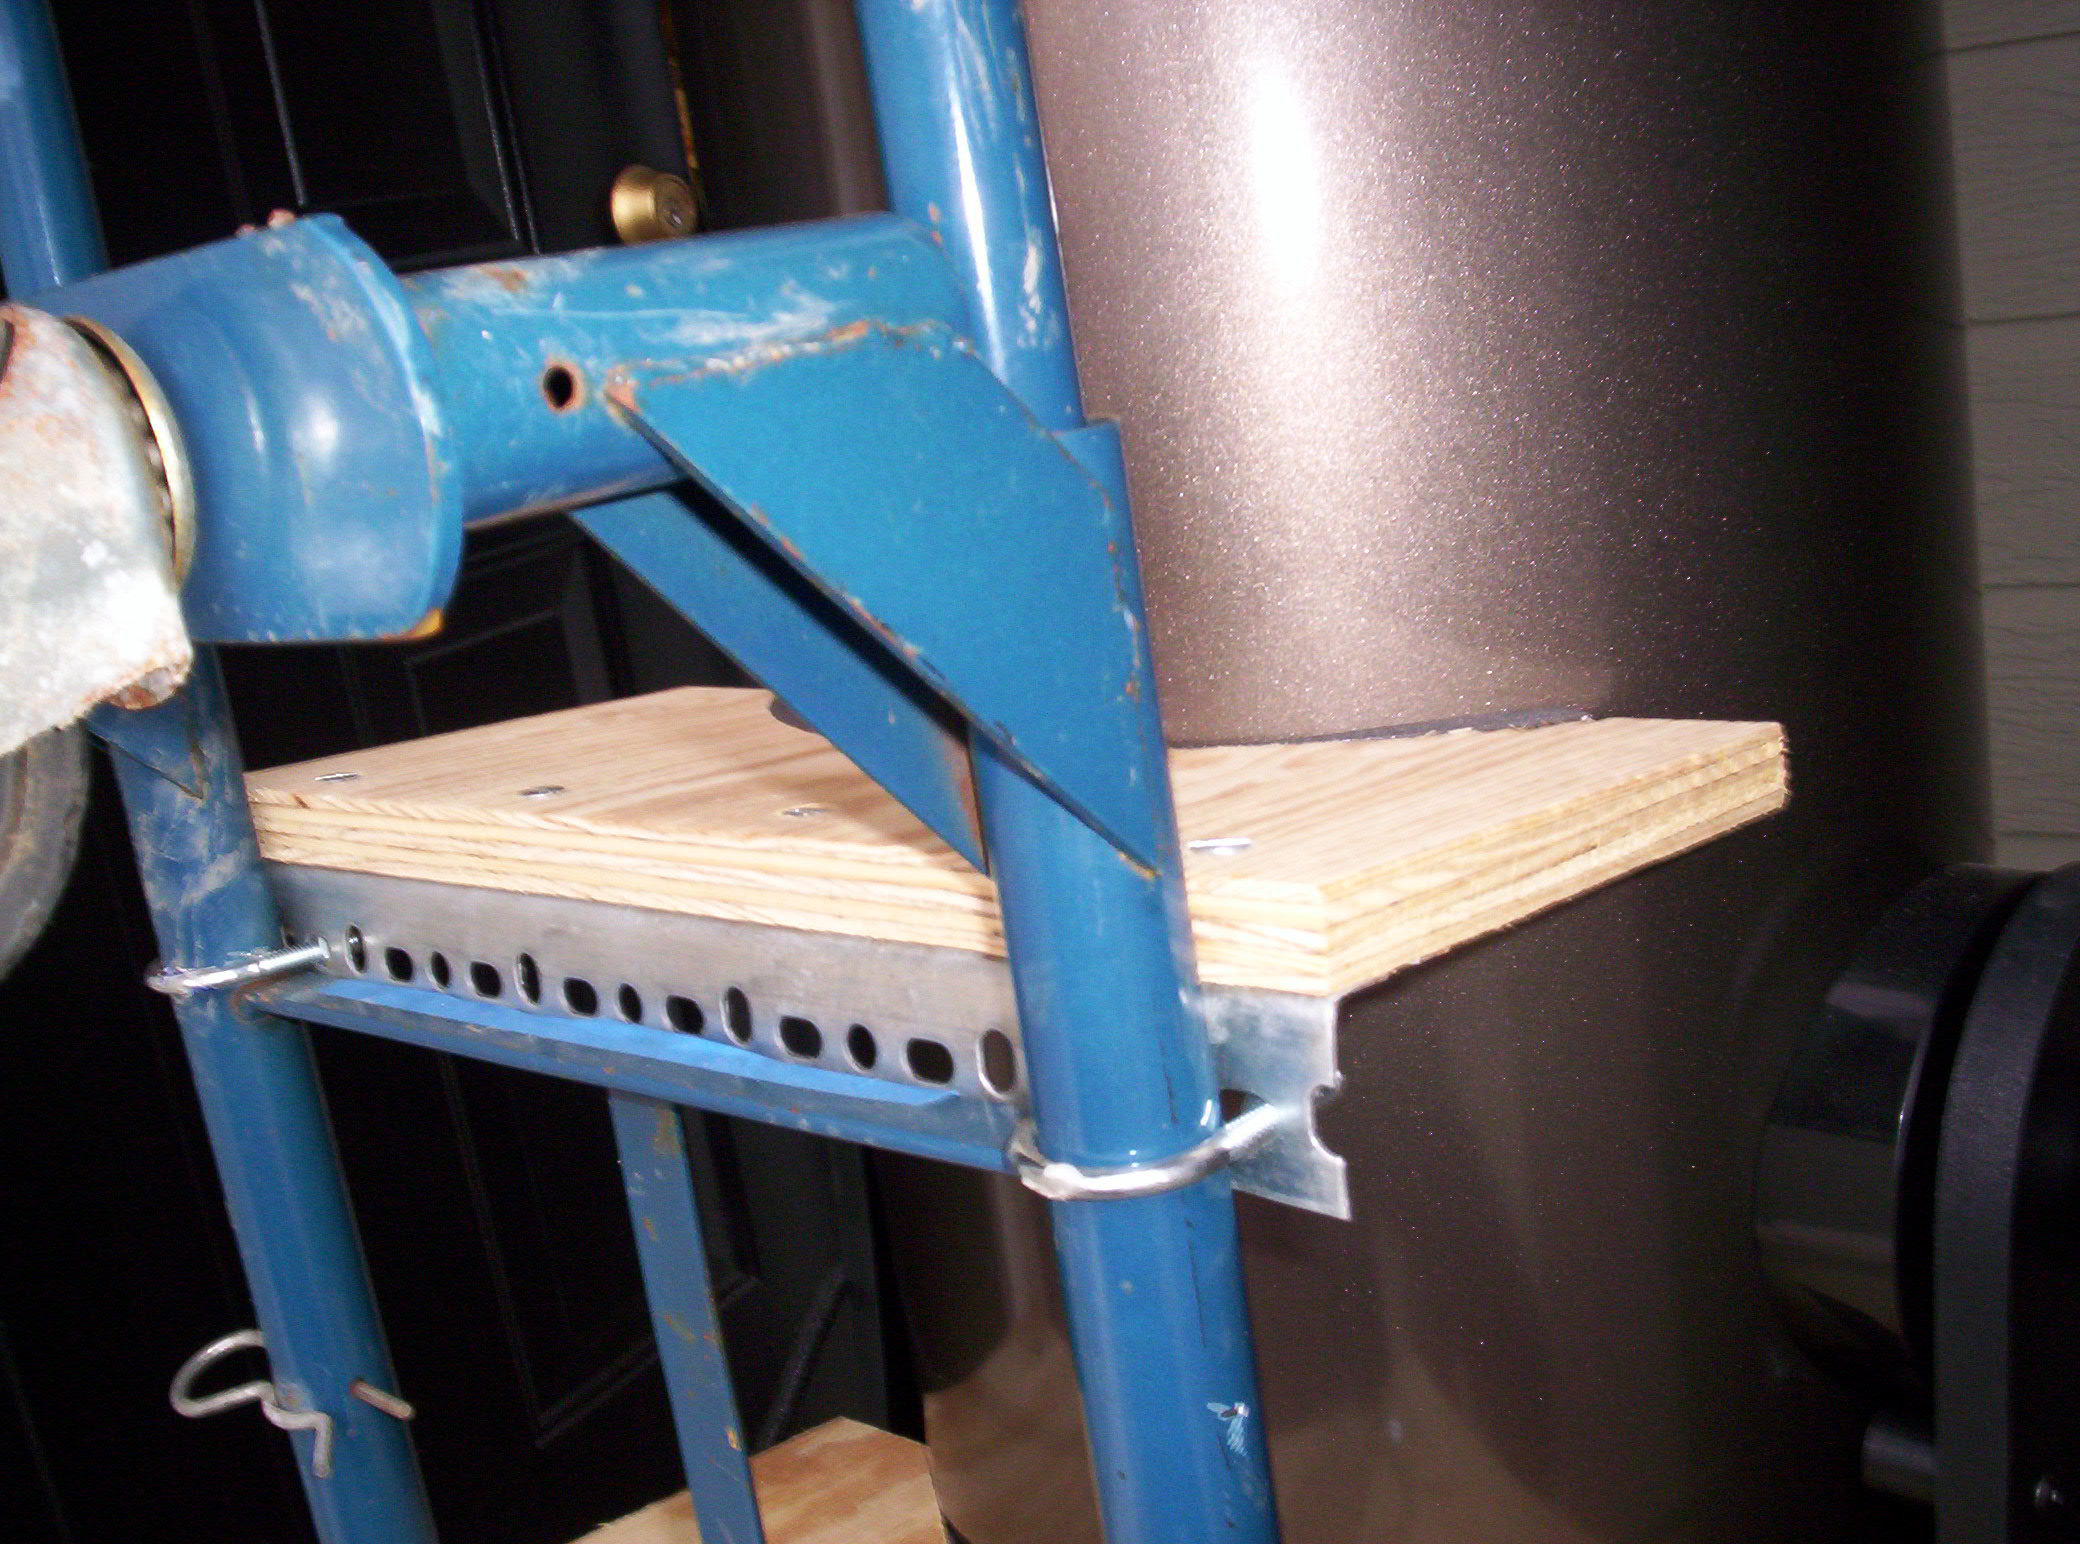
Here is a close-up view of one of the cradles. Construction is self-explanatory: I used 3/4-inch plywood for the cradle; steel angle iron (got a 4-foo0t long piece and cut it with a hacksaw) to support the wooden cradle and to attach the wood to the handcart; steel U-bolts to hold the angle iron onto the handcart; flat-head bolts with nuts to bolt the wood to the angle iron; foam weather-stripping to cushion the scope tube from the wood.
Another close-up. Look at the U-bolts that hold the angle iron onto the handcart. When you purchase supplies to build the cradle, be certain to measure the diameter of the upright rails on the handcart and buy U-bolts that are wider than the diameter of the upright tube on the handcart-- I guessed at the diameter and the U-bolts were just a bit small -- I had to force them onto the handcart. Look at the bottom wooden cradle -- you will see three of the four bolts that hold the wood onto the angle iron -- they are countersunk into the wood -- the bolts go through the wooden cradle, through holes in the angle iron, and are secured with nuts underneath the angle iron.
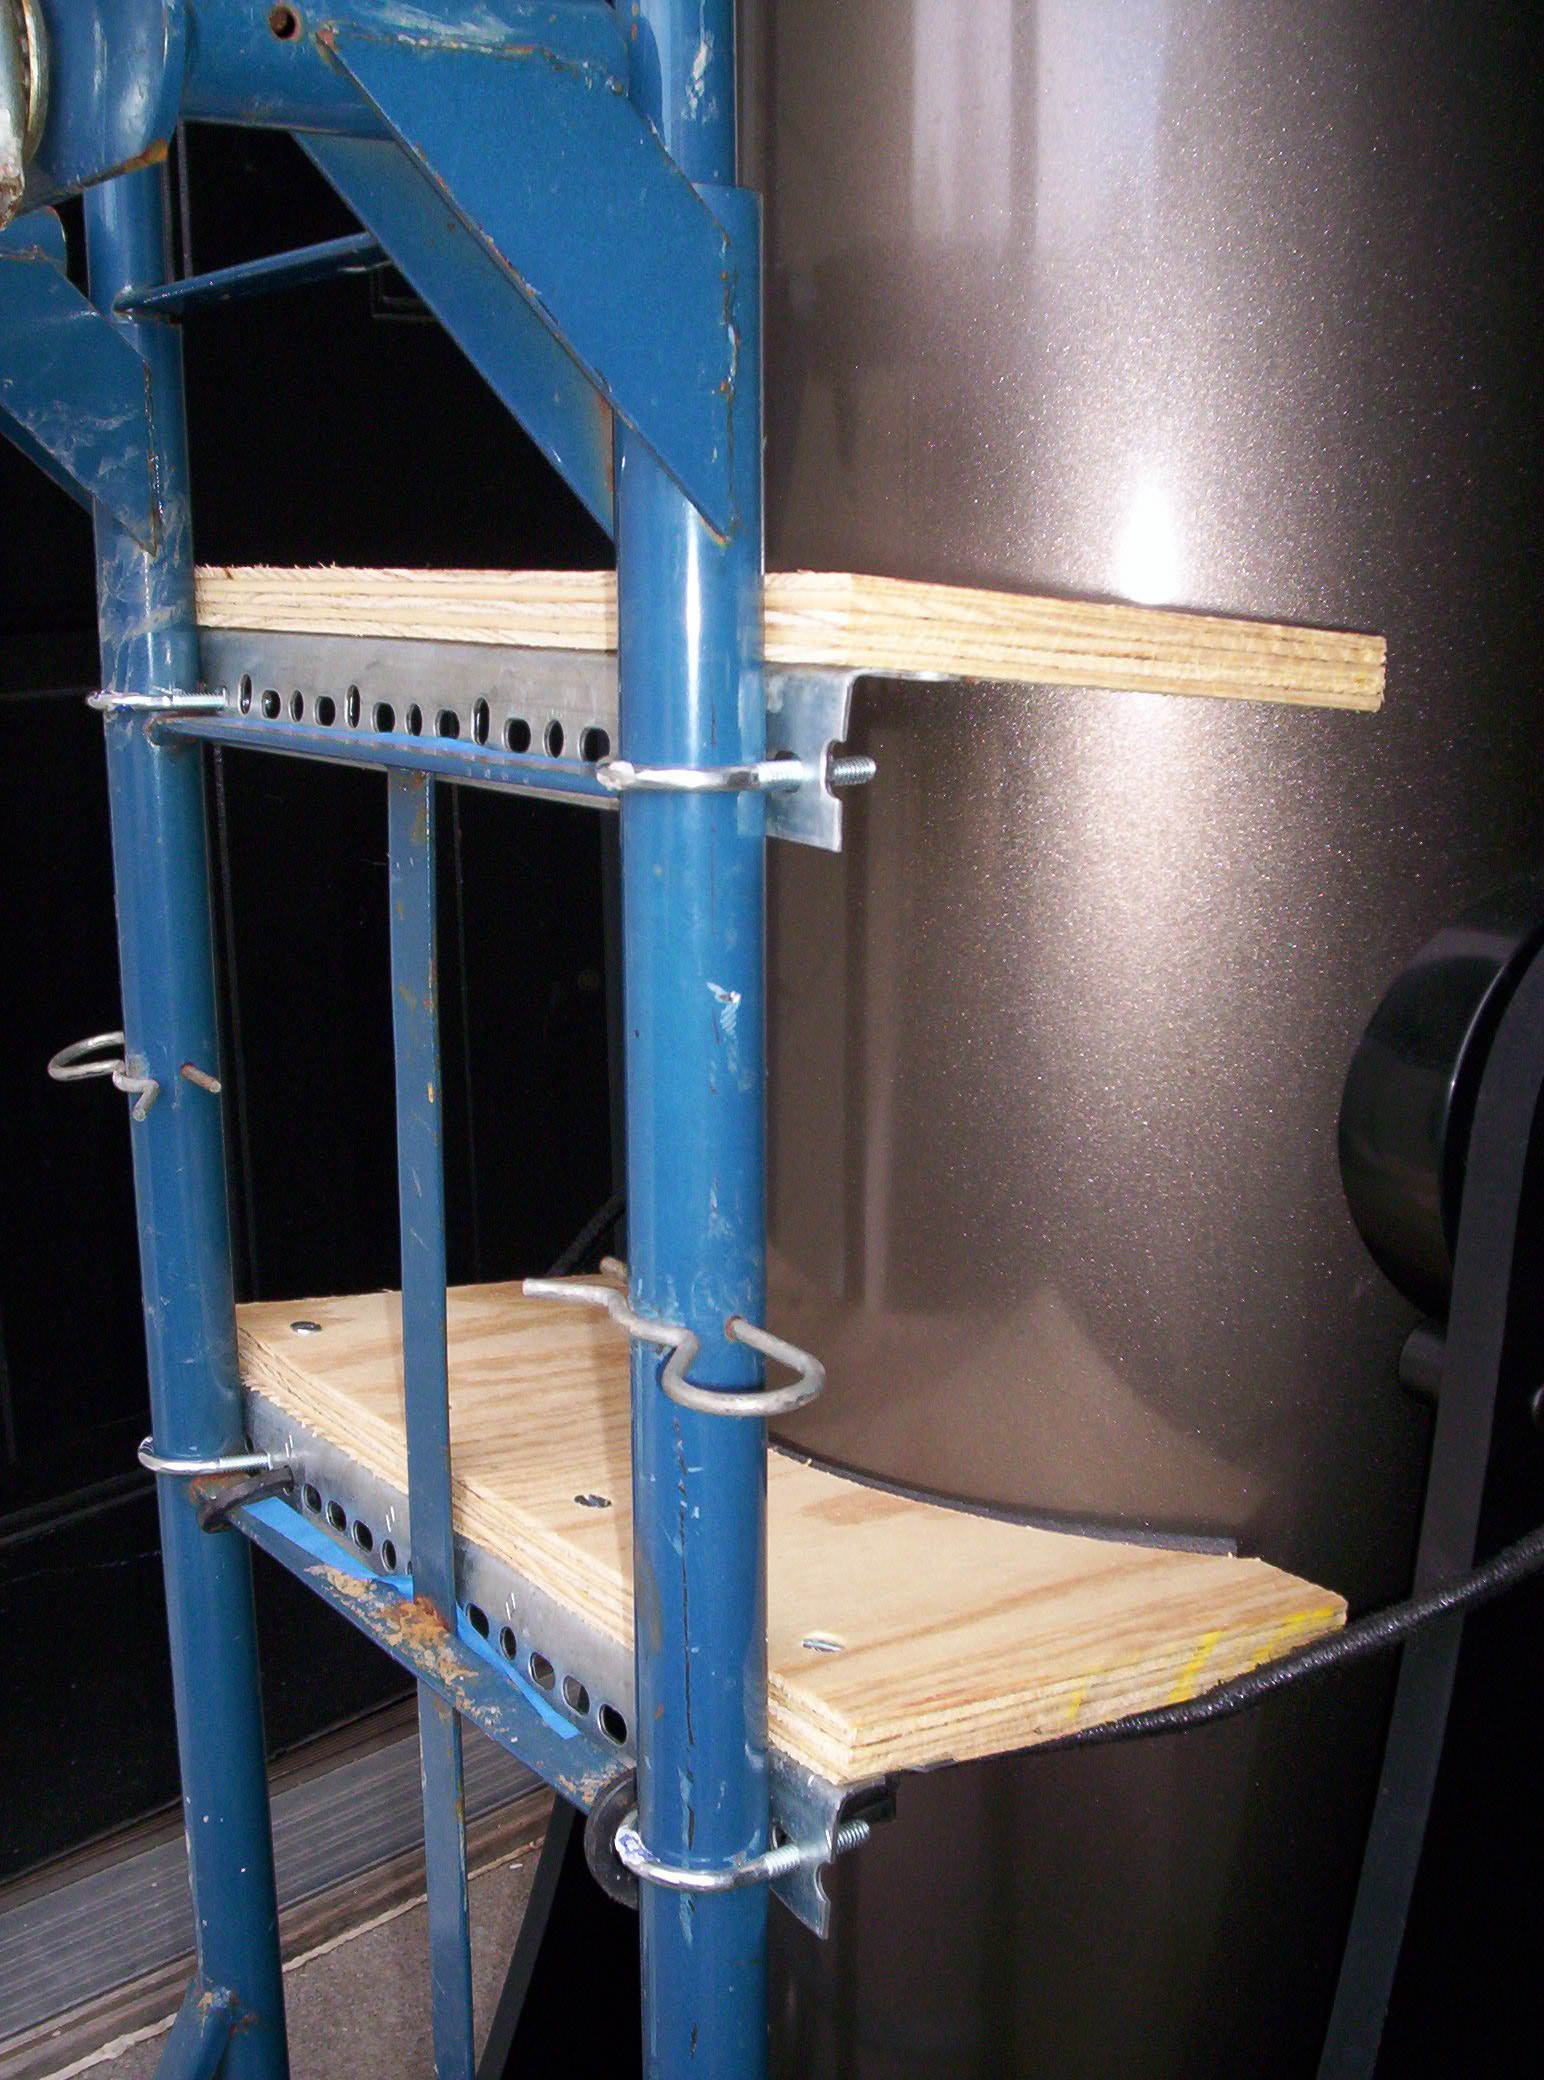
Another close-up. Look at the point where the scope tube contacts the wooden part of the cradle. You can just see the gray foam weather-stripping I added for cushioning. I purchased a roll of 3/4-inch wide foam rubber weather-stripping with adhesive on one side -- stick it onto the cradle so the scope's tube does not bang into the wood and get scratched. Also, check the bungee that I wrap around the scope to hold it onto the cart when transporting the scope.

Finally, here is a view of the bottom of the handcart -- complete with mud and rust left over from when the handcart was submerged in Katrina. Look closely at the bottom of the scope, where it contacts the cart -- I stuck three pieces of weather-stripping at these contact points just to keep from scratching the bottom of the scope.
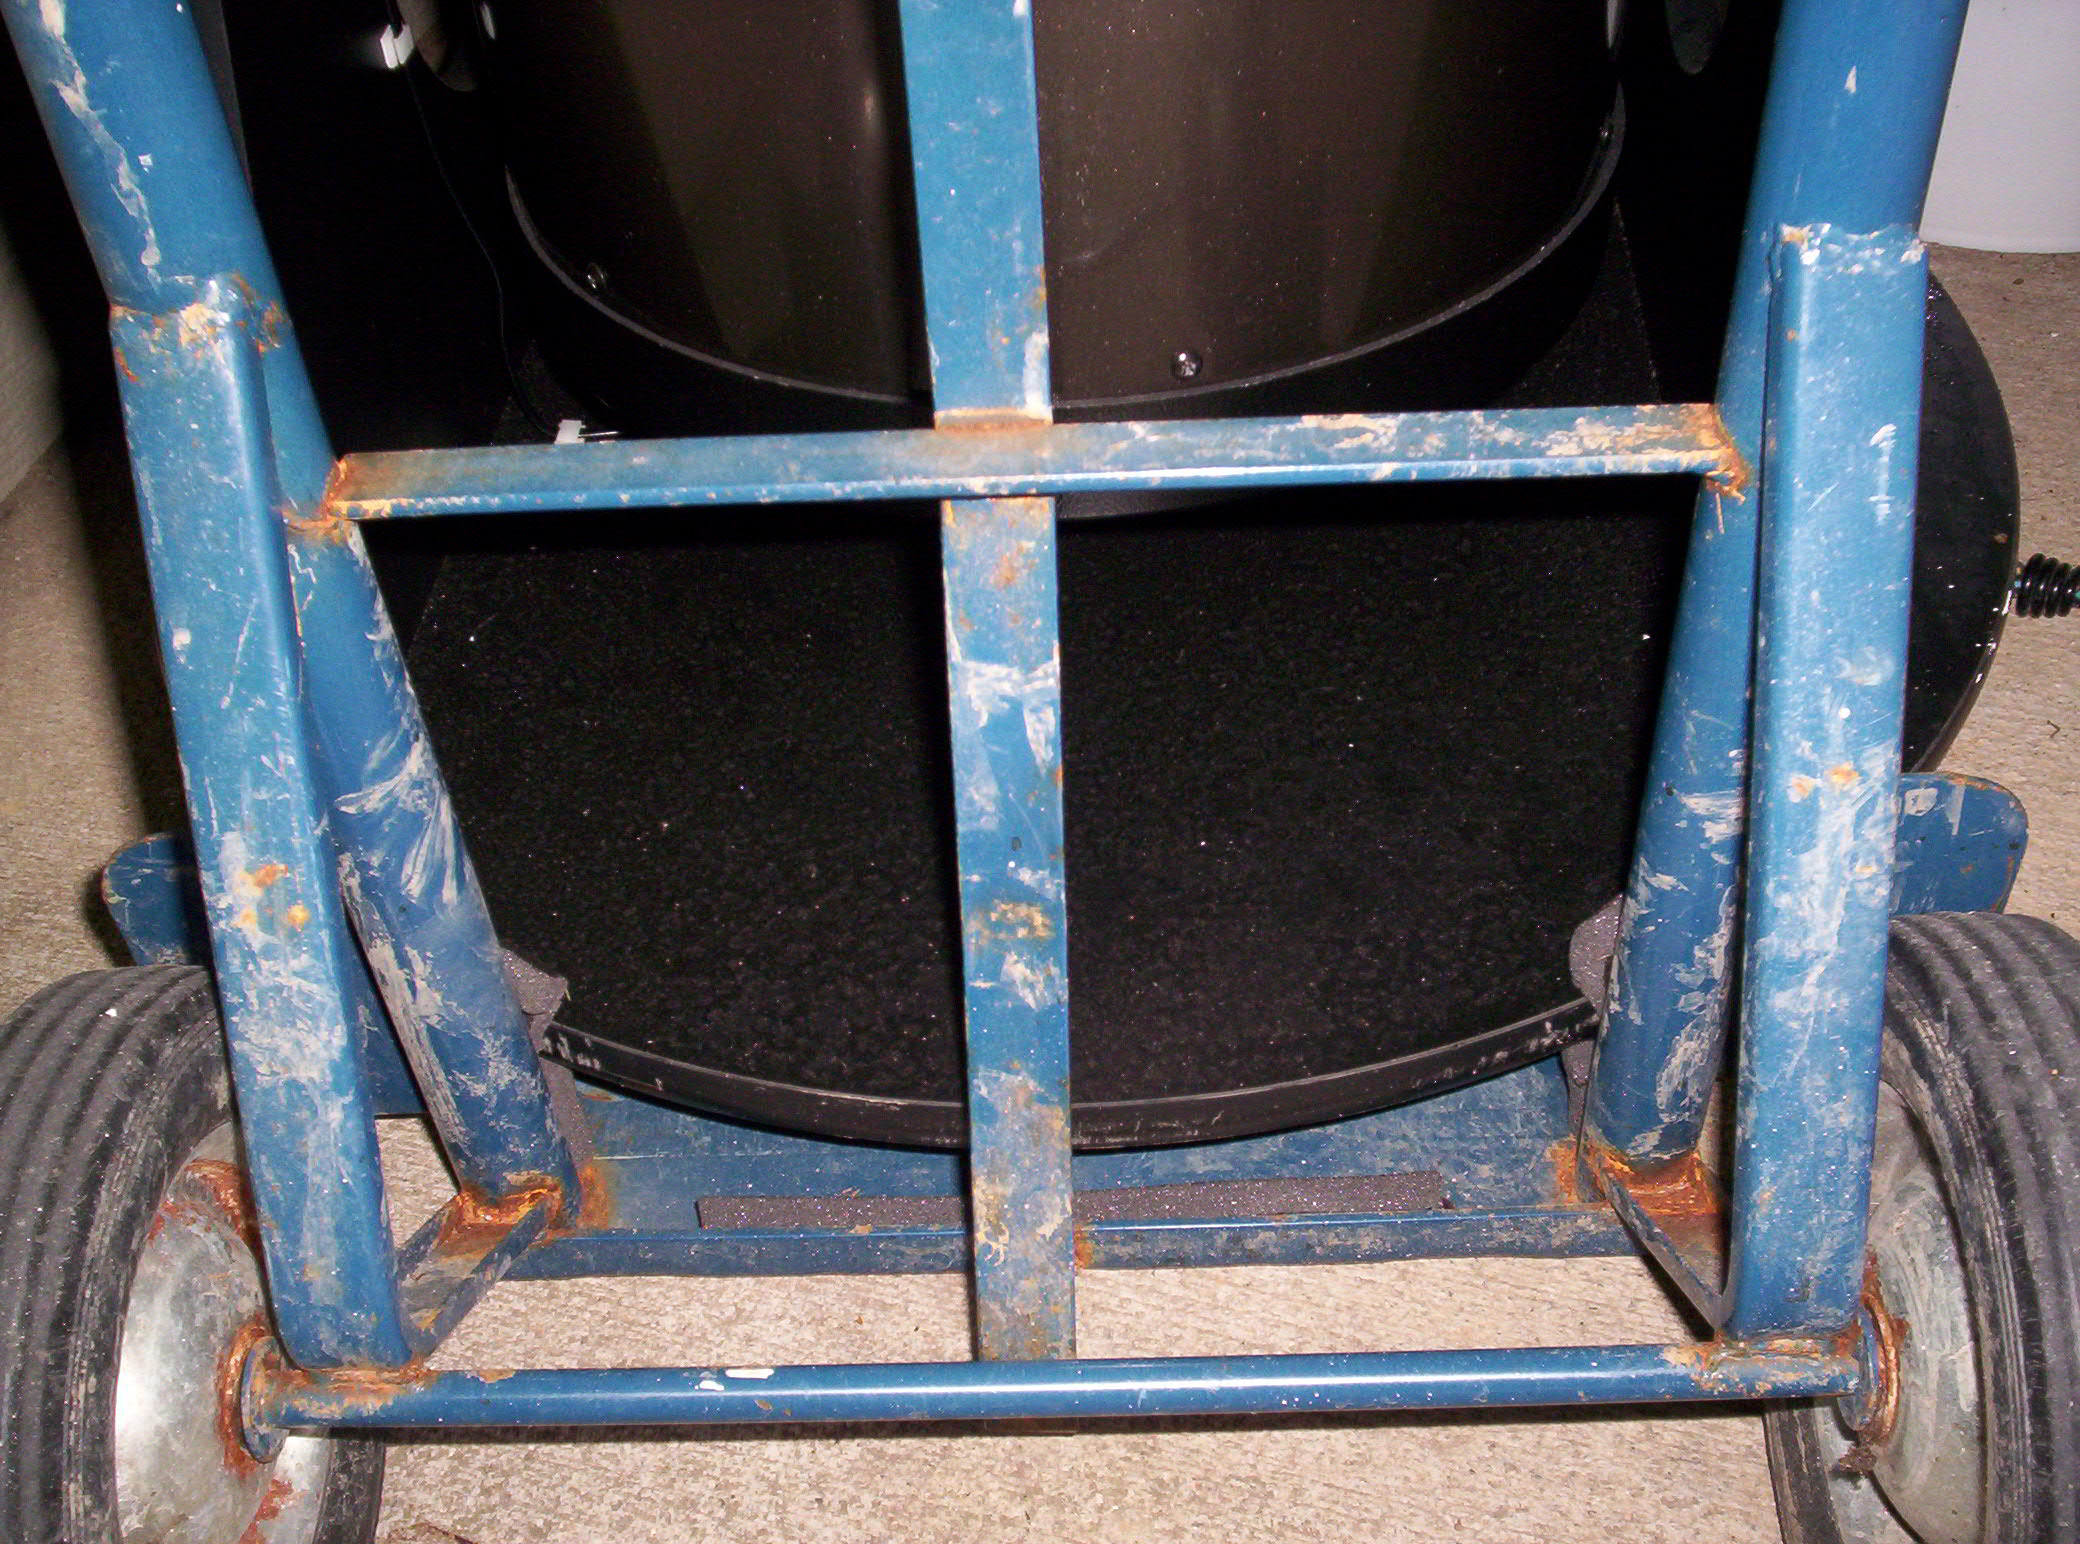
Now, here's another factor to consider: The base of the scope has two bottom plates: the lower bottom plate is triangular with one foot on each corner of the triangle. On top of this is the upper base plate, it is round. When you move the scope on the handcart, the base of the handcart goes under the scope -- but -- if you stick the handcart under the scope so that it contacts one of the feet on the triangular bottom base plate, the scope will not be resting on the cart -- be certain to stick the cart under the scope so it goes under one of the straight edges of the triangular bottom plate -- that way, the scope is resting on the load-bearing part of the cart. As you tip the hand truck back, the scope will settle down into the cradle. This sounds confusing -- but -- after you assemble your scope and try to move it with a handcart, you will see how it works.
I hope this information is helpful.
UPDATE: As of 16 February 2006, I replaced the two-wheel hand truck pictured here with a similar 2-wheeler with pneumatic tires -- that is, tires inflated with air just like the tires on your car. You can find these 2-wheelers with pneumatic tires at any big home improvement store or hardware store -- Lowe's, Home Depot -- Harbor Freight also carries the same 2-wheeler. The advantage to the pneumatic tires is that the scope rides much more gently than on the old cart pictured here with solid rubber tires -- I recommend you use the hand truck with pneumatic tires.
| Back to main astronomy page |
| XT-12 telescope page 1 |
| XT-12 telescope page 2 |
|
Back to telescopes page |
| Go to the Intelliscope handheld computerized controller page |