Orion XT-12 Intelliscope;
Newtonian Reflector
on a
Dobsonian mount
In January 2005 we moved from Bristol, TN to Bay Saint Louis, MS. We were living in an apartment almost on the beach and were building a house in the neighboring town of Waveland, MS, one block off the beach. Most of our possessions were stored in Pass Christian, MS. On 29 August 2005, Hurricane Katrina destroyed all three towns -- Waveland, Bay Saint Louis, and Pass Christian. We lost almost everything we owned. Read about our Katrina experiences here.
My two telescopes were lost in the hurricane. Afterward, we moved to Knoxville, TN and after we received our insurance settlement, I purchased an Orion XT-12 Dobsonian reflector telescope to replace the two lost in the hurricane. This article describes the XT-12 -- it's a BIG scope and I am very pleased with it.
The XT-12 is a big telescope -- the mirror is 12 inches in diameter and, fully assembled, the scope and its mount are 6 feet tall -- I am 6'-1" and the end of the scope tube is at the top of my head. Scope and base weigh 85 pounds -- the Optical Tube Assembly weighs 51 pounds and the base is 34 pounds. Optical Tube Assembly -- OTA -- is the long tube that holds the mirror, focuser, finder scope, and other optical parts -- I will use the term "OTA" to refer to the OTA and I will use the term "scope" to refer to the OTA and base assembled into a telescope.
Why such a big scope? The larger the scope, the more light it gathers and the deeper into the sky you can see. The size of a scope refers to the diameter of the opening through which the scope observes the universe -- the XT-12 has a 12-inch mirror and its opening is 12 inches, thus, this scope has a 12-inch aperture. Some general rules in amateur astronomy are "aperture rules" and "you can never have too much aperture." For amateur astronomers, an 8-inch scope like my XT-8 (destroyed in Hurricane Katrina) is an excellent scope -- I just wanted more aperture so I replaced the lost 8-inch with this 12-incher.
Click on this link to go to the Orion Telescopes and Binoculars website to see more about the XT-12.
This is an XT-12 Intelliscope, meaning that the scope has encoder wheels built into its base that move as the scope moves. These wheels generate electronic data that is fed to a handheld computer (the Intelliscope controller); the computer translates that data into positioning information so the computer knows where the scope is pointed. The computer then refers to its built-in database of astronomical objects -- stars, planets, nebulae, etc.. If you want to find a certain object, you first align the scope then find the object in the controller -- the controller then displays arrows telling you to move the scope right, left, up, down until you get to the object. There are much more detailed instructions accompanying the scope and on the Orion website. On 23 December I used the Intelliscope controller for a few minutes -- I was quite pleased with the way the controller works -- here is an article describing the Intelliscope controller.
Meanwhile, let's look at the XT-12. I have divided this section into two pages because of the number of graphics.
If you are interested in the Intelliscope handheld computerized controller, go to this link.
UPDATE: On 28 January 2006, I took some new photos of the XT-12 that showed modifications I made to the scope and to the two-wheel handcart that I use to transport the scope. Click on this link to see the updated photos and information.
Here's what the XT-12 looks like, fully assembled. I use the handcart to move the scope -- it weighs 85 pounds and is a real load. You can pull off the OTA (51 pounds) and move the OTA and the base (34 pounds) separately -- the scope comes apart and goes back together with no difficulty -- takes a few seconds to disassemble/reassemble. Check this page for modifications to the handcart.
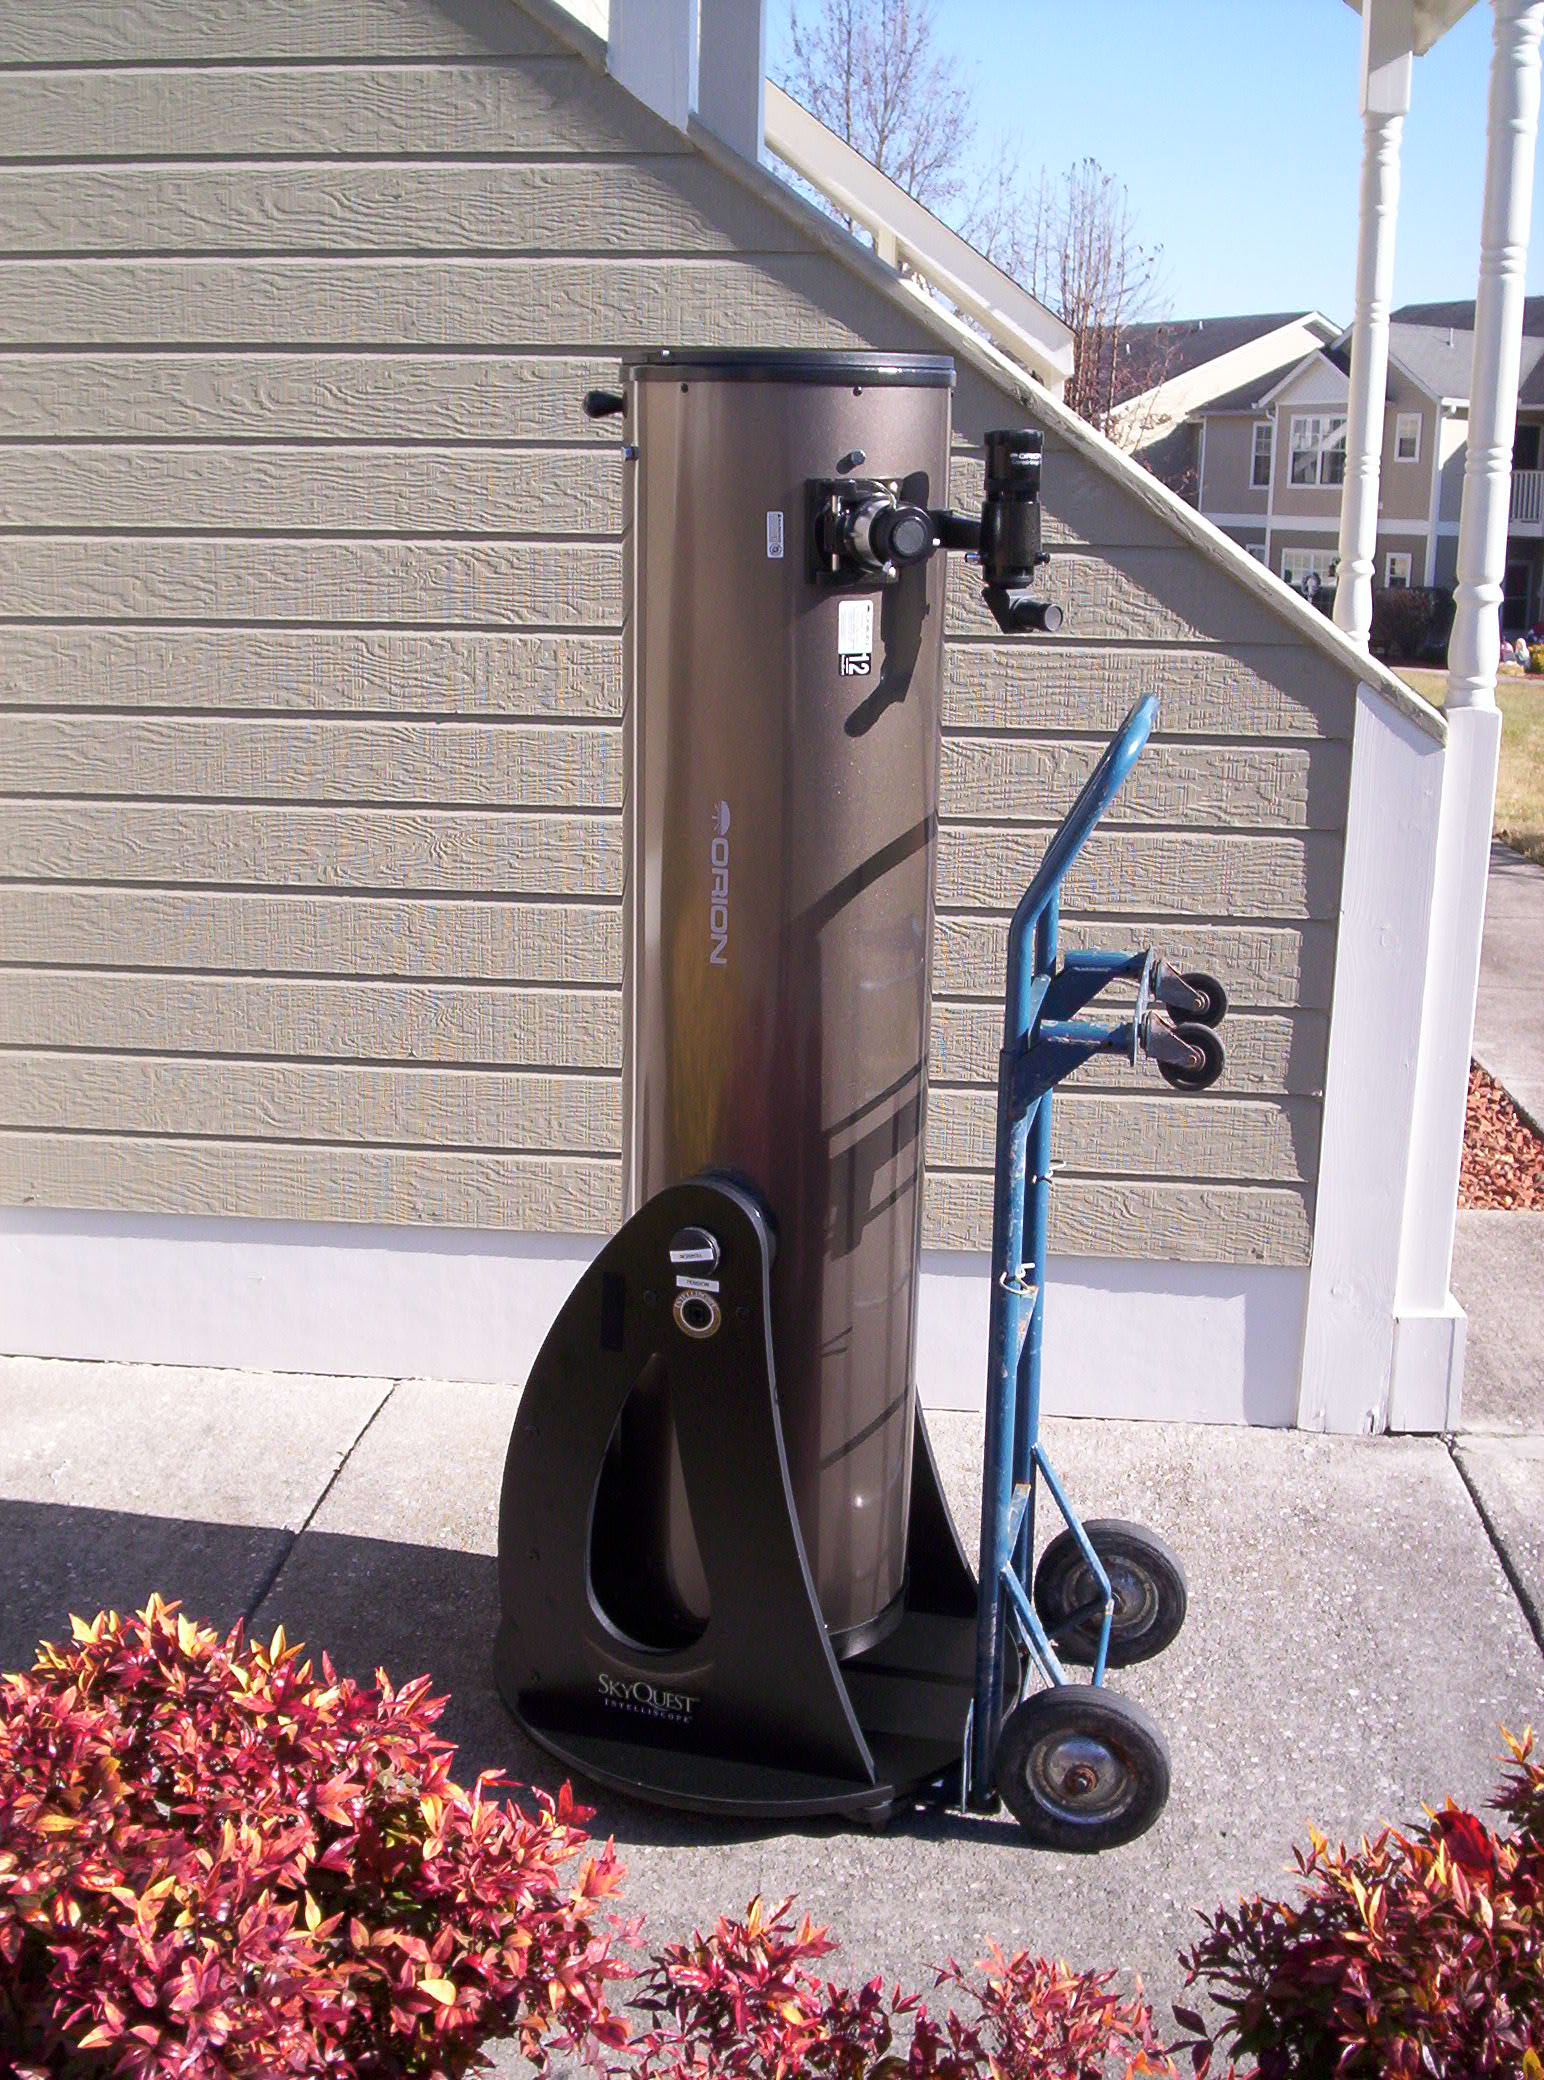
The OTA is the long, grey-brown metal cylinder -- the mirror is in the bottom, finder scope and focuser are at the top. The black part is the base on which the OTA rides -- the base swivels around in a circle, the OTA pivots on the base for altitude. Note at the top of the base are two white strips -- these are labels that I put on the tensioning knob -- there are two knobs, one tension knob, one retaining knob and they are different -- I labeled each knob and its position to keep me straight.
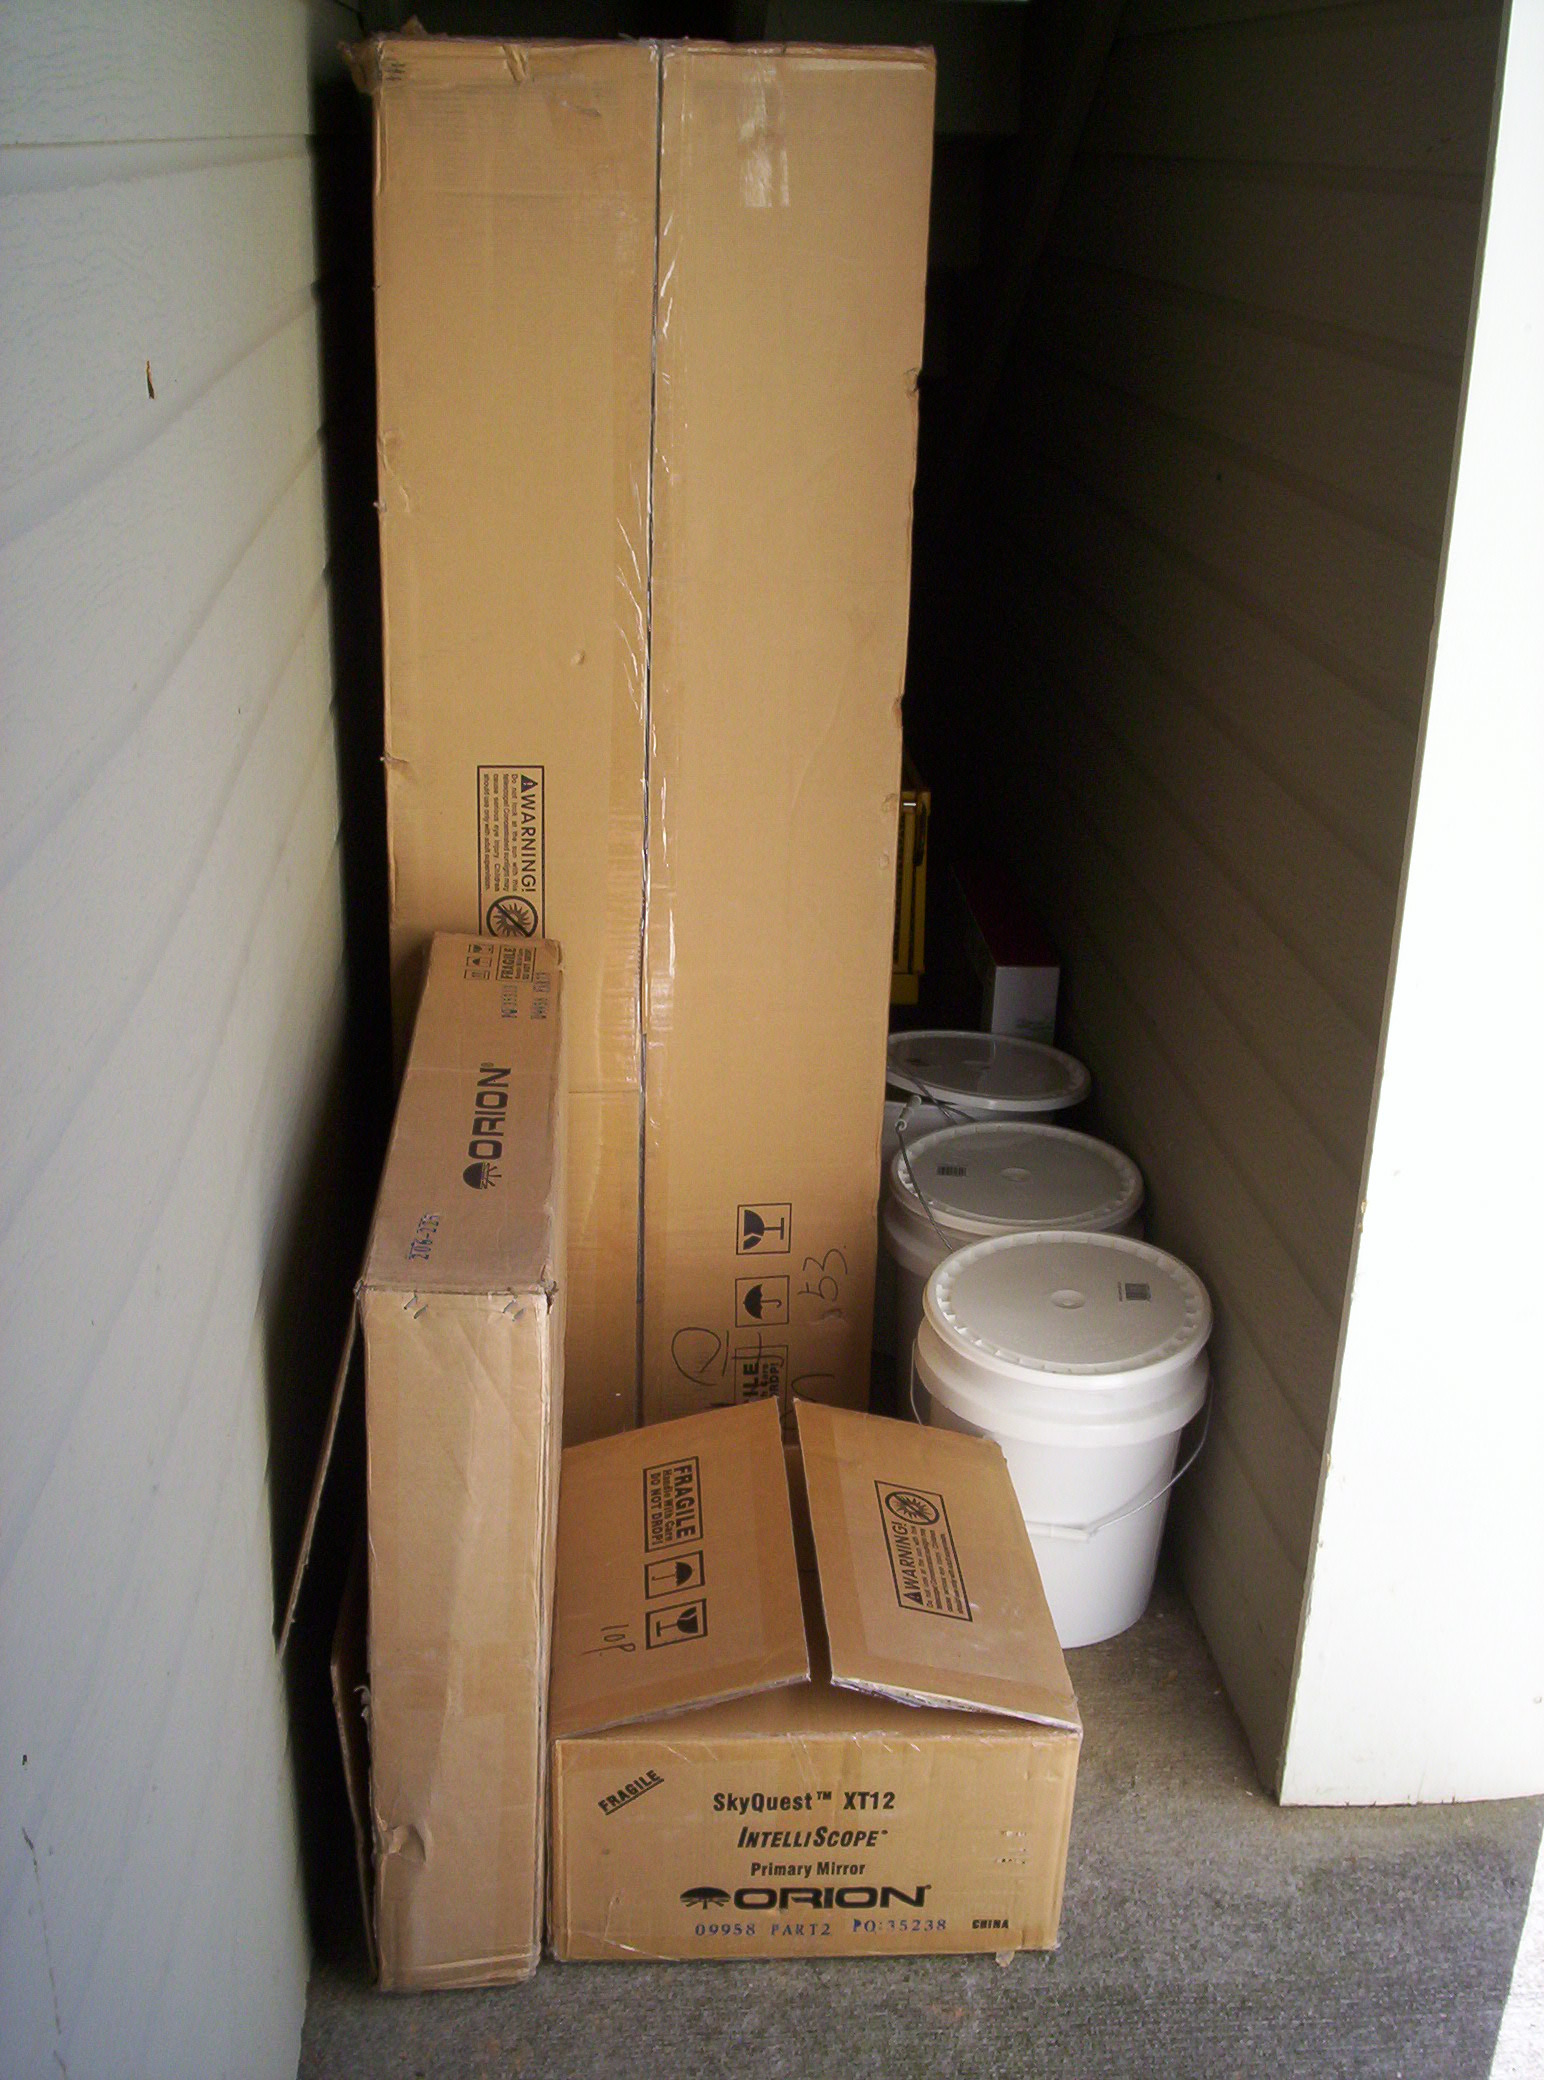
This is how the scope arrived -- three boxes from FedEx; arrived four days after I ordered it. I had opened the boxes before this photo was taken. The OTA and small parts are in the tall box; base is unassembled in the flat box standing up on left; mirror is in the box in the bottom center. (White buckets are our recycle buckets -- glass, plastic, aluminum.)
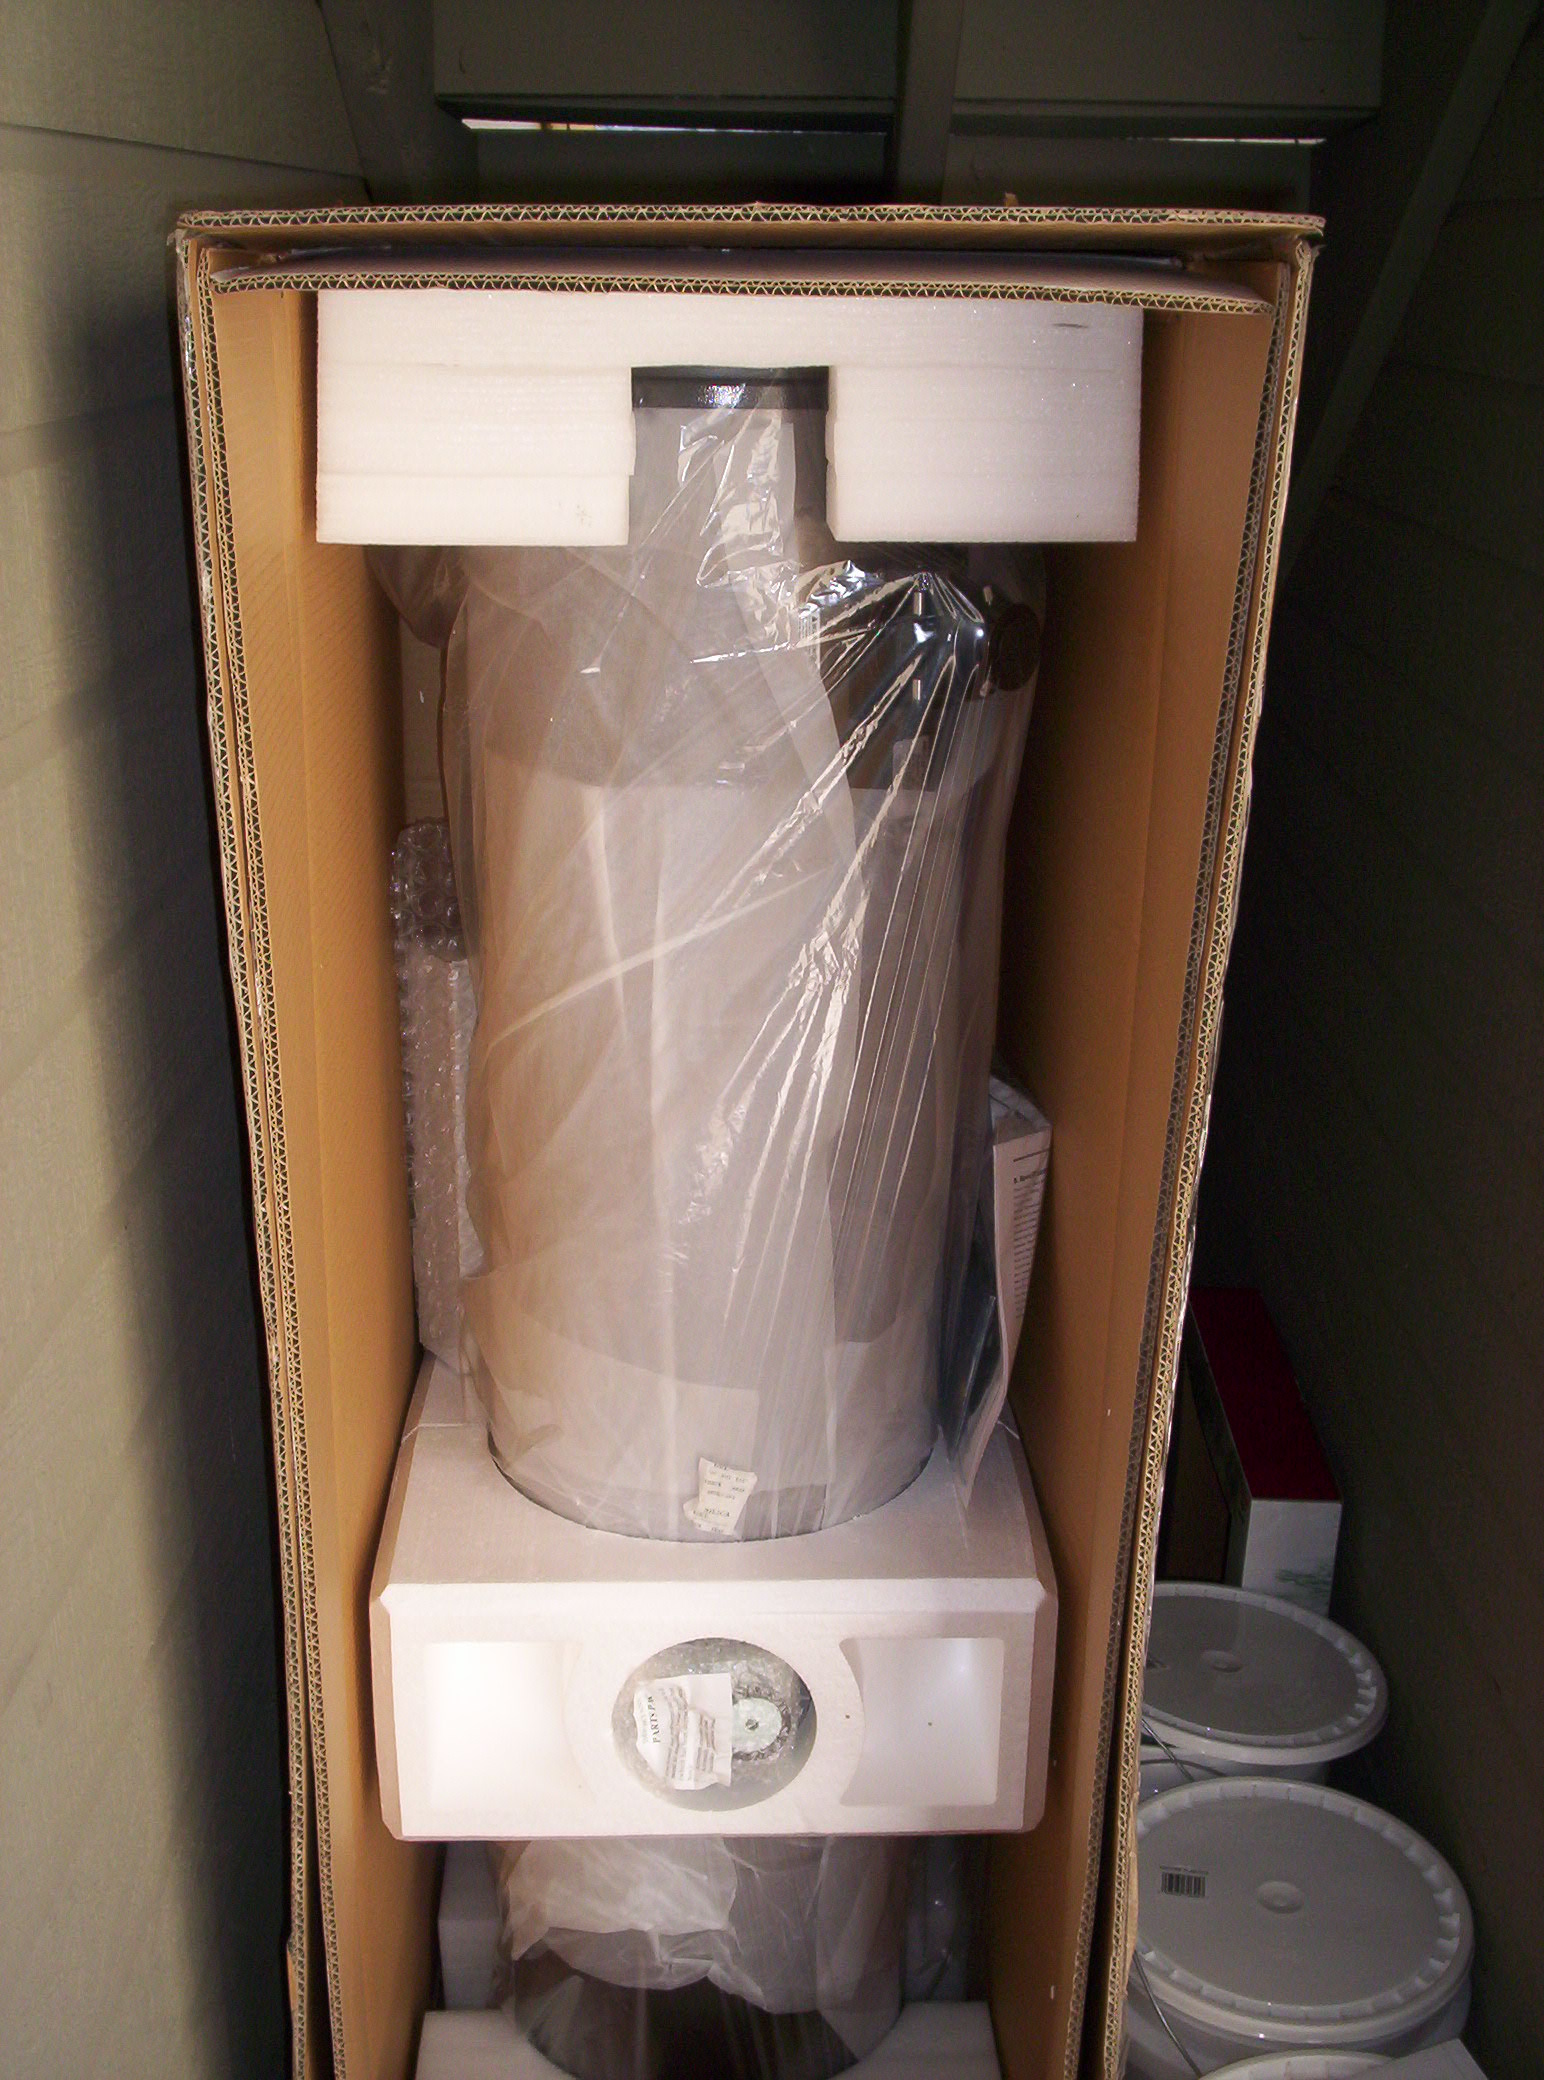
Here's the inside of the OTA box. Small parts are packed in the box that's wrapped in bubble wrap to the left of the OTA; assembly and use instruction sheet is on the right of the OTA -- the instructions are EXCELLENT, detailed, illustrated, very easy to follow.
When you are assembling this scope, do not let your kids, dogs, cats, ferrets, in-laws, nieces and nephews, or anyone else come into the room with you -- lock the door -- you don't need the distraction, you don't need cat footprints on the mirror, and you can do this by yourself easily. Took me one hour to assemble my scope.
The mirror is packed separately. The OTA has steel reinforcing rings installed on each end. To install the mirror, you must remove the steel ring from the bottom of the tube, attach the ring to the mirror, and re-attach the ring and mirror assembly to the OTA. It takes longer to describe how to do this than it takes to do it.
|
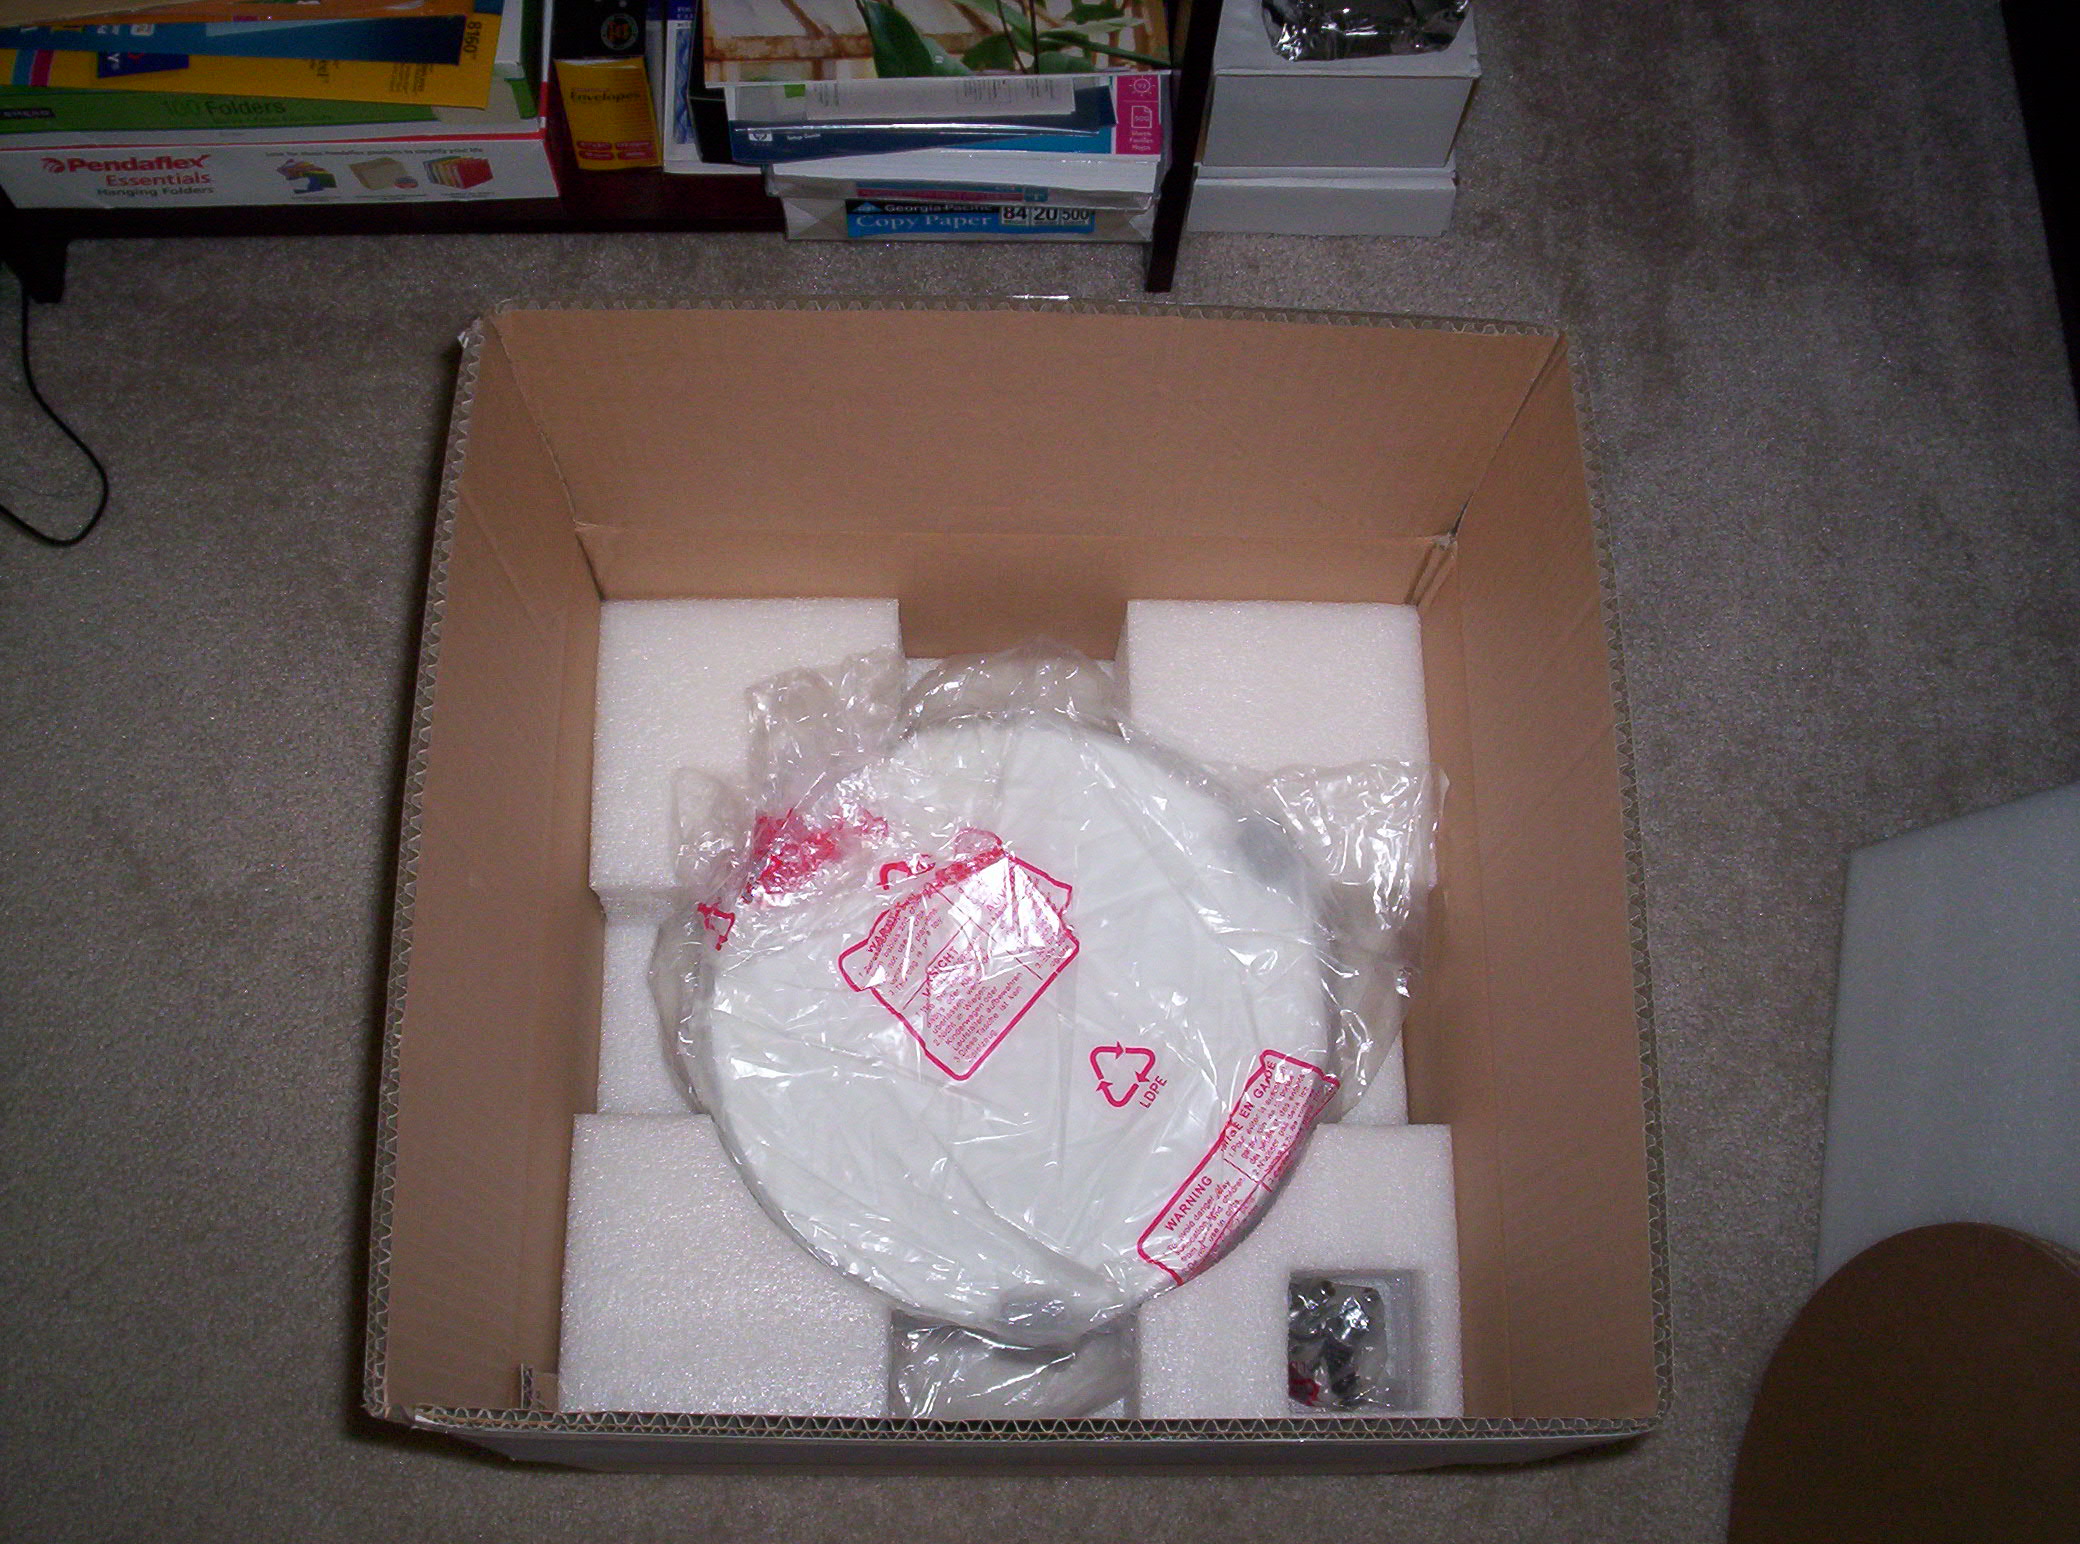
Photo of mirror in box. |
Photo of mirror removed from box. |
|
|
|
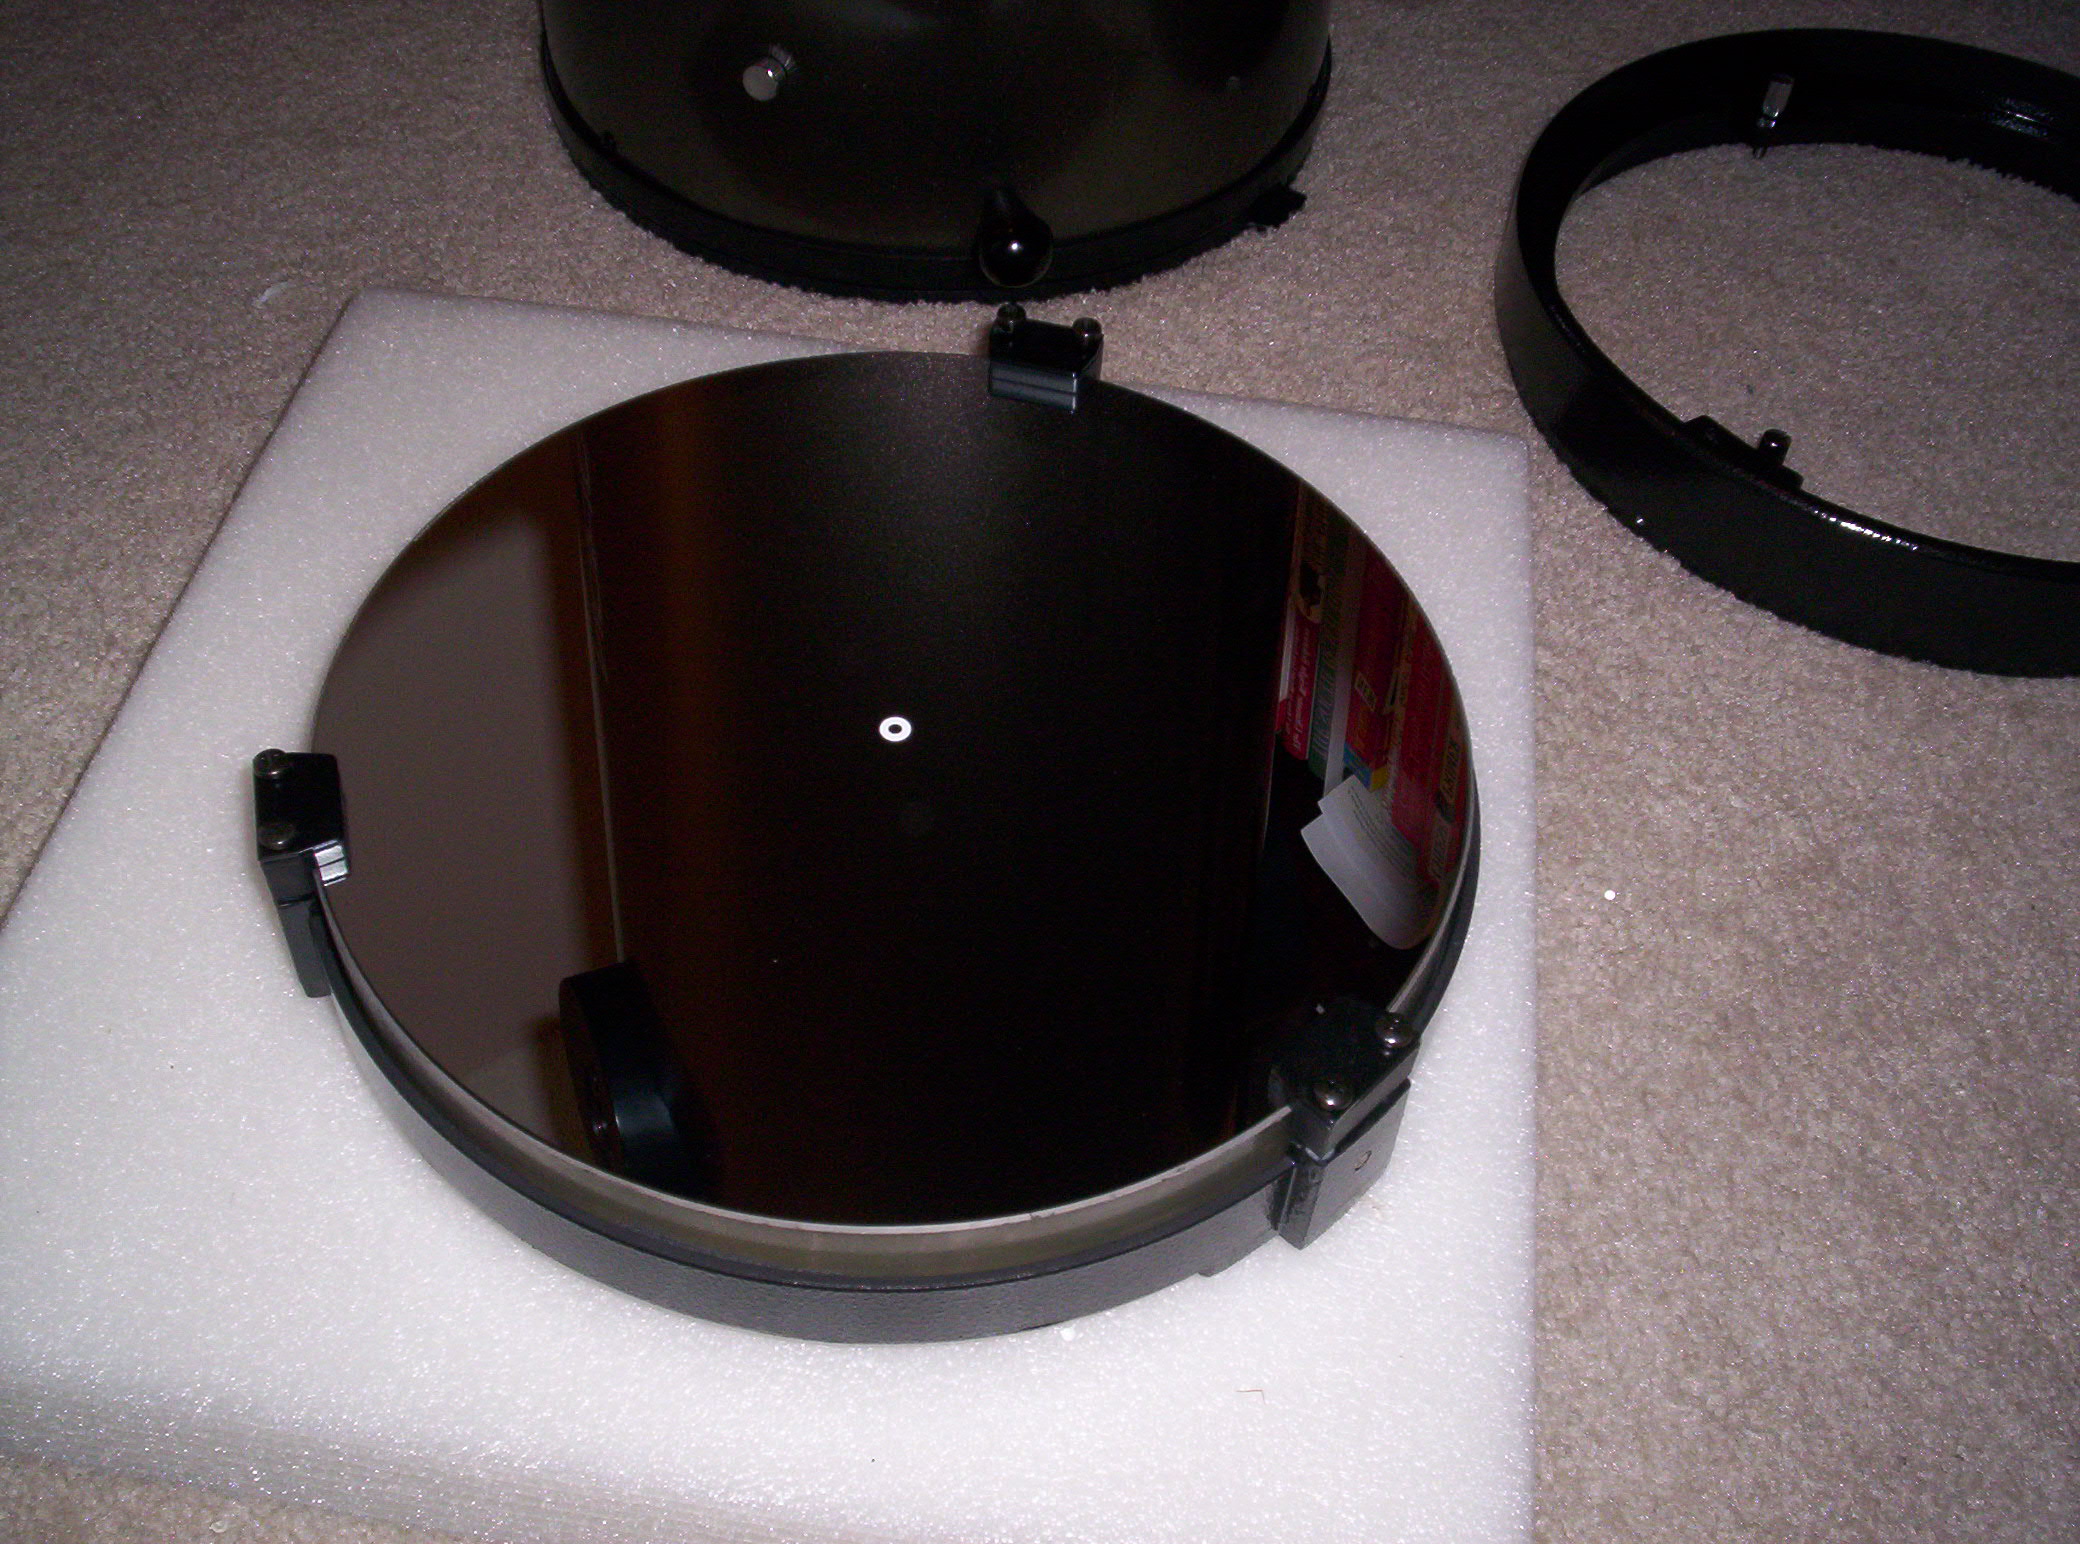
CAREFUL!!! The mirror is a big chunk of glass and it will tolerate some rough handling -- but -- DON'T HANDLE IT ROUGHLY. Handle the mirror with a firm grip -- it's heavy and if you don't grasp it tightly and securely, you can drop it -- and you don't want to drop it. Also -- DO NOT EVEN THINK ABOUT TOUCHING THE SHINY SIDE OF THE MIRROR -- it has been coated with highly reflective material. Don't try to clean it, don't try to flick dust off it -- DO NOT EVEN THINK ABOUT TOUCHING THE SHINY SIDE OF THE MIRROR.
-
In the left-hand photo above you are looking down into the mirror packing carton. The mirror is packed SHINY SIDE DOWN.
-
The right-hand photo above shows the mirror unpacked, looking at the shiny side. The white spot in the center of the mirror is the factory-installed center mark -- you need this for collimation.
-
In the top right corner of the right-hand photo you see the steel ring removed from the OTA that is to be installed on the mirror. This ring goes ON THE BACK OF THE MIRROR. I turned the mirror shiny-side up just so I could photograph it. The mirror is sitting on a piece of foam packing material -- mirror is wrapped in clear plastic (like Saran Wrap) -- lay the plastic wrap on top of the shiny side, turn the mirror over so the shiny side is on the white foam, and follow the instructions for attaching the steel ring to the mirror cell.
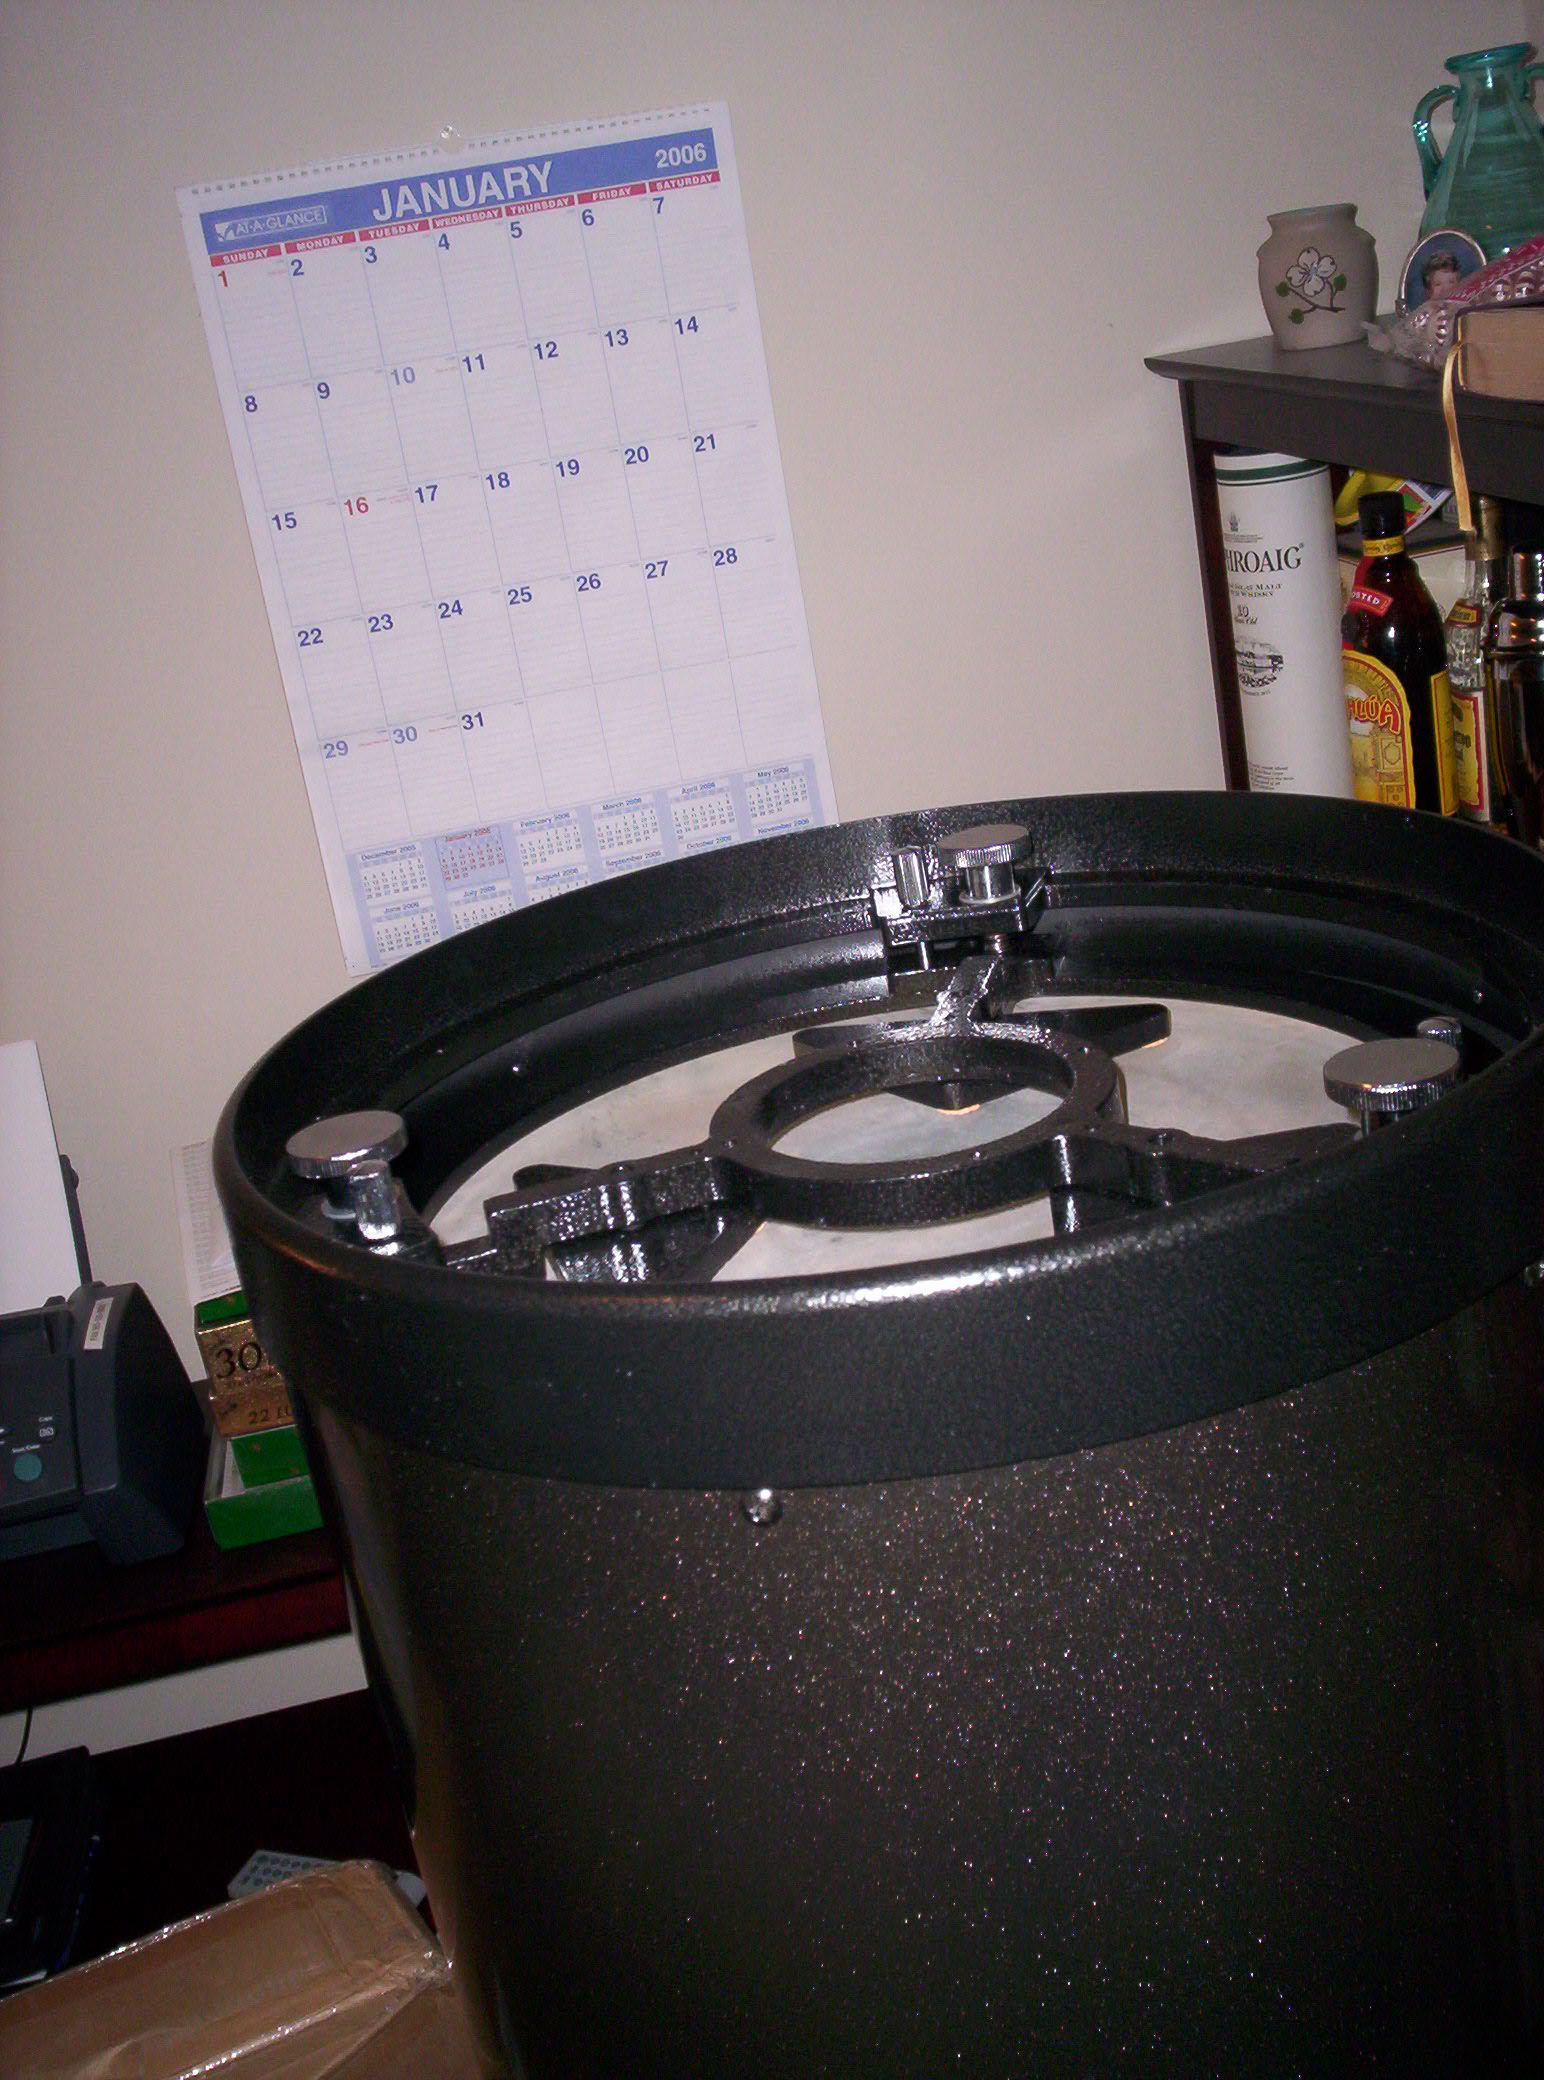
This photo shows the mirror cell attached to the steel ring and the steel ring re-installed onto the bottom end of the OTA -- turn the OTA upside-down with the top (open) end on the floor for this operation. The big silver knobs are used to collimate the scope -- next to each big chrome adjustment knob is a smaller locking knob.
NOTE: The scope must be collimated before you use it. Here is an article that describes how I collimated my 8-inch scope -- the process is exactly the same. Collimation requires that you adjust the secondary mirror THEN the primary -- I found that the secondary mirror was in perfect adjustment from the factory -- the instructions say you should not need to adjust the secondary and I did not need to -- I adjusted only the primary mirror and collimation was perfect.
Click on the link below to go to XT-12 Page Two.
| Back to main astronomy page |
| XT-12 telescope page 2 |
| XT-12 telescope page 3 (modifications to the scope and the handtruck) |
|
Back to telescopes page |
| Go to the Intelliscope handheld computerized controller page |